How To Make a Website From Scratch in 7 Days
Building your own website might seem like climbing Everest. Still, I promise it’s more like a brisk walk up Arthur’s Seat – challenging but doable in a week.
I’ve guided hundreds of complete beginners through this process.
Some arrived knowing nothing beyond how to send an email.
Yet, they’ve walked away with professional-looking sites that actually work. You can, too.
- Begin with a comprehensive plan outlining website purpose, audience, and structure to ensure a successful build.
- Choose user-friendly platforms like WordPress or website builders for ease of use and functionality.
- Focus on mobile responsiveness and SEO optimisation to enhance user experience and visibility.
- Regularly update and maintain your site for ongoing effectiveness and growth after launch.
Day 1: Planning Your Website Journey

You need a proper plan before writing a single line of code or choosing colours. Much like you wouldn’t build a house without blueprints, launching into website development without planning is a recipe for disaster.
Define Your Website’s Purpose
What’s your site meant to do? Is it:
- A portfolio to showcase your work?
- An online shop to sell products?
- A blog to share your thoughts?
- A business site to generate leads?
Your answer shapes every decision moving forward. For instance, an e-commerce site needs product pages, shopping cart functionality, and payment processing. In contrast, a simple portfolio might need a few well-designed galleries.
Know Your Audience
Who are you building this website for? Understanding your target audience influences your design choices, content tone, and functionality requirements.
For example, a website for pensioners might benefit from larger font sizes and straightforward navigation. At the same time, a site targeting tech-savvy millennials could incorporate more interactive elements and complex features.
Map Your Site Structure
Sketch your website’s blueprint. What pages do you need? How will users navigate between them? A clear site map helps you visualise the user journey and identify potential issues before they arise.
Most websites include these standard pages:
- Home page
- About page
- Services/Products page
- Contact page
Beyond these basics, consider what other pages your specific website requires. A restaurant might need a menu page and booking system, while a photographer needs a portfolio gallery.
Content Planning
Content drives websites. Make a list of all the content you’ll need for each page:
- Text (copy)
- Images
- Videos
- Downloadable files
- Interactive elements
Don’t worry about everything being perfect – you can refine content later. Just make sure you’ve got a clear idea of what belongs where.
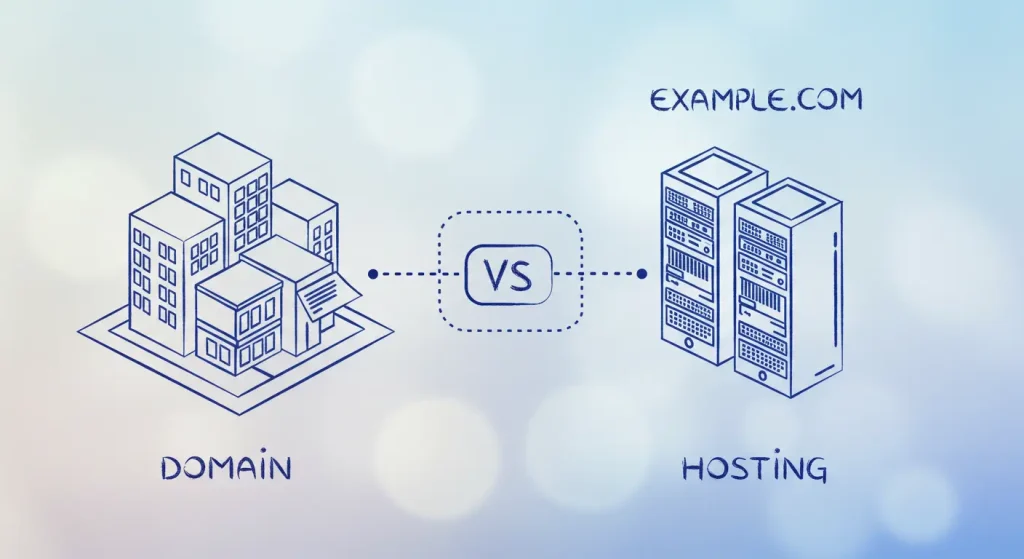
Day 2: Securing Your Domain and Hosting
Today’s all about getting the technical foundations sorted. However, don’t stress – these steps are far simpler than they sound.
Choosing the Perfect Domain Name
Your domain name is your website’s online address – it’s what people type to find you. A good domain name is:
- Memorable
- Relevant to your brand or purpose
- Relatively short
- Easy to spell and pronounce
- Preferably a .com or your country-specific extension (.co.uk, .ca, etc.)
Use a domain registrar like Namecheap or GoDaddy to check if your preferred name is available. If your first choice is unavailable, consider alternatives rather than settling for obscure extensions like .xyz.
Top tip: Avoid hyphens and numbers in domain names as they’re harder to communicate verbally and more prone to typos.
Selecting a Web Host
Your web host is like the plot of land where your website “lives.” Different hosting options provide different benefits:
Shared Hosting
- Most affordable (typically £3-10/month)
- Suitable for beginners and small websites
- Performance can suffer during high-traffic
- Examples: Bluehost, SiteGround, Hostinger
VPS (Virtual Private Server)
- Mid-range option (£20-50/month)
- Better performance and reliability
- Requires more technical knowledge
- Examples: DigitalOcean, Linode, Vultr
Dedicated Hosting
- Premium option (£100+/month)
- Maximum performance and control
- Requires significant technical expertise
- Examples: Rackspace, OVH, Amazon EC2
For most beginners creating their first website, shared hosting provides the best balance of affordability and ease of use. Many hosts also offer one-click WordPress installation, which we’ll discuss tomorrow.
Setting Up Your Hosting Account
Once you’ve chosen a host, you’ll need to:
- Create an account
- Select a hosting plan (start with the basic plan – you can upgrade later)
- Enter your domain information
- Complete the payment process
After payment, you’ll receive emails with login details for your hosting control panel (typically cPanel), where you can manage various aspects of your website.
Connecting Domain to Host
If you purchased your domain and hosting from different companies, you must connect them by updating the nameservers for your domain. This sounds complex, but it involves:
- Getting the nameserver addresses from your hosting company (usually provided in welcome emails)
- Logging into your domain registrar account
- Finding the nameserver or DNS settings
- Replacing the existing nameservers with those offered by your host
- Saving changes
DNS changes can take up to 24-48 hours to propagate globally, though they often complete much faster. During this waiting period, you can begin setting up your website.
Day 3: Choosing Your Website Building Approach
There are multiple ways to build a website. Today, you’ll decide which path suits your skills, time constraints, and project requirements.
Option 1: Website Builders (No-Code Solution)
Website builders offer drag-and-drop interfaces that make creating a website as simple as assembling digital building blocks. These are perfect if you:
- Have zero coding experience
- Need to launch quickly
- Have a limited budget
- Prefer visual editing
Popular website builders include:
- Wix
- Squarespace
- Shopify (for e-commerce)
- Webflow (more advanced)
Pros:
- Extremely user-friendly
- Pre-designed templates
- All-in-one solutions (hosting included)
- Regular updates and security are handled for you
Cons:
- Less flexibility and customisation
- Potential limitations for complex features
- Ongoing subscription costs
- Possible challenges if you want to move platforms later
Option 2: Content Management Systems

Content Management Systems (CMS) offer more flexibility while being relatively user-friendly. WordPress, in particular, powers over 40% of all websites worldwide due to its balance of power and accessibility.
Popular CMS platforms:
- WordPress.org (self-hosted, not to be confused with WordPress.com)
- Joomla
- Drupal
Pros:
- Highly customisable with themes and plugins
- Robust content management capabilities
- Large community and support resources
- One-time purchase themes with no recurring fees (except hosting)
Cons:
- Steeper learning curve than website builders
- Requires more maintenance and security awareness
- May need some basic technical understanding
Option 3: Custom Coding
Building a website from scratch with HTML, CSS, and JavaScript gives you complete control but requires coding knowledge.
Pros:
- Unlimited customisation possibilities
- No unnecessary code bloat
- Potentially faster loading times
- Complete ownership of all aspects
Cons:
- Requires significant technical knowledge
- More time-consuming
- You handle all maintenance and security
For complete beginners aiming to complete their project in seven days, I recommend either a website builder or WordPress, depending on your longer-term needs. If you’re keen to learn coding but want to launch within a week, consider starting with a template and customising it gradually.
Most small business owners and creative professionals find WordPress to be a suitable choice, as it strikes a balance between ease of use and growth potential. Let’s focus on that approach for the remainder of this guide, though many principles apply regardless of your chosen platform.
Day 4: Setting Up WordPress and Basic Configuration

WordPress is our vehicle for this journey – it’s like the Swiss Army knife of website platforms. Let’s get it up and running.
Installing WordPress
Most quality hosting providers offer “one-click WordPress installation.” Here’s how it typically works:
- Log in to your hosting control panel (cPanel, Plesk, or custom dashboard)
- Find the “WordPress” or “Website” section (often labelled with the WordPress logo)
- Click “Install WordPress” or a similar option
- Select your domain
- Fill in basic information (site name, admin username, password)
- Click install
Alternatively, you can install WordPress manually using the famous “5-minute installation” process for more control.
Essential First Steps After Installation
Once WordPress is installed, log in to your admin dashboard (usually yourdomain.com/wp-admin) and take these critical initial steps:
- Update your profile
- Navigate to Users → Your Profile
- Change your display name
- Add biographical info if desired
- Use a strong password
- Configure general settings
- Go to Settings → General
- Verify site title and tagline
- Check timezone settings
- Update email address if needed
- Set up permalinks
- Go to Settings → Permalinks
- Select “Post name” (better for SEO)
- Save changes
- Install essential plugins
- Navigate to Plugins → Add New
- Search for and install:
- RankMath (for search engine optimisation)
- Wordfence Security (protection against hackers)
- UpdraftPlus (automated backups)
- WP Rocket (improves site speed)
- Set up automated backups
- Configure UpdraftPlus to store backups in a secure location (e.g., Dropbox, Google Drive).
- Schedule weekly backups at a minimum
Choosing and Installing a Theme
Your theme determines your website’s appearance and basic functionality. WordPress offers thousands of free and premium themes.
To install a theme:
- Go to Appearance → Themes
- Click “Add New”
- Browse featured themes or search by feature
- Preview themes that catch your eye
- Install and activate your chosen theme
For beginners, I recommend starting with multipurpose themes like:
- Astra
- OceanWP
- GeneratePress
- Divi (premium)
- Avada (premium)
These themes are flexible enough to create nearly any website while remaining user-friendly.
After installing your theme, explore its customisation options under Appearance → Customise. Here, you can typically adjust the following:
- Colours
- Fonts
- Header layout
- Footer elements
- Homepage layout
- Widget areas
Don’t get bogged down with perfecting every detail yet – we’ll refine the design later.
Day 5: Building Your Core Pages

Today is about creating the essential content that forms the backbone of your website. Let’s focus on quality over quantity.
Creating Your Homepage
Your homepage is your digital front door – it needs to make a strong first impression. Most WordPress themes include homepage customisation options through either:
- The WordPress Customizer (Appearance → Customise)
- A page builder plugin like Elementor or Beaver Builder
- Theme-specific options panels
Key elements for an effective homepage:
- Clear value proposition – Explain what you offer and why visitors should care within the first screen view
- Call-to-action (CTA) – What should visitors do next? Make it obvious.
- Social proof – Testimonials, reviews, client logos, or statistics
- Brief overview of services/products – With links to learn more
- Recent content – Blog posts or news if relevant
Many themes include homepage templates you can customise rather than starting from scratch. Use these as a foundation to save time.
Essential Pages Every Website Needs
About Page: The About page is among the most visited pages on most websites. Include:
- Your story (keep it relevant to visitors’ interests)
- Team information, if applicable
- Your values and approach
- What differentiates you from competitors
- Another clear call-to-action
Services/Products Pages: Create individual pages for your primary services or product categories. Structure these pages with the following:
- Clear descriptions of what you offer
- Benefits to the customer (not just features)
- Pricing information, where appropriate
- Process explanation if relevant
- FAQS specific to that service/product
- Strong call-to-action
Contact Page: Make it easy for people to reach you:
- Contact form (use plugins like Contact Form 7 or WPForms)
- Email address (consider using a form instead if concerned about spam)
- Phone number, if applicable
- Physical address, if relevant
- Business hours
- Social media links
- Embedded Google Maps if you have a physical location
Legal Pages: Depending on your location and website type, you may legally need the following:
- Privacy Policy
- Terms of Service
- Cookie Notice
- GDPR compliance information
WordPress has plugins that can generate these pages based on your information. However, consider having them reviewed by a legal professional for complete accuracy.
Setting Up Your Navigation Menu
A well-structured navigation menu helps visitors find what they need quickly:
- Go to Appearance → Menus
- Create a new menu or edit the existing one
- Add your core pages
- Arrange them in a logical order
- Consider adding “child” pages as dropdowns under the main categories
- Assign the menu to your primary navigation area
Limit your main navigation to 5-7 items at most for improved usability. Consider using secondary menus, footer menus, or sidebar navigation if you have a large number of pages.
Day 6: Design Refinement and Content Polishing

With your website structure in place, today’s about making everything look professional and compelling.
Fine-tuning Your Visual Design
Your website’s visual design has a significant impact on how visitors perceive your brand. Focus on these elements:
Consistent Colour Scheme
- Choose 2-3 primary colours plus 1-2 accent colours
- Utilise colour psychology to evoke the desired emotions (blue for trust, green for growth, etc.).
- Apply your colour scheme consistently throughout the site
- Use contrast for readability and emphasis
Typography
- Select no more than 2-3 fonts (often one for headings, one for body text)
- Ensure text is readable (minimum 16px for body text)
- Maintain consistent text hierarchy (H1, H2, H3, etc.)
- Check font rendering across devices
Image Optimisation
- Use high-quality, relevant images
- Compress images before uploading (using tools like Tinypng)
- Add descriptive alt text for accessibility and SEO
- Consider consistent styling (filters, crops, etc.) for visual cohesion
Spacing and Layout
- Use whitespace strategically to improve readability.
- Ensure consistent margins and padding
- Maintain alignment throughout the site
- Check that the content flows logically
Mobile Responsiveness
With over half of web traffic coming from mobile devices, your site must work flawlessly on small screens:
- Preview your site on various device sizes (use your theme’s mobile preview or Chrome DevTools)
- Check for:
- Text readability without zooming
- Properly sized tap targets (buttons, links)
- No horizontal scrolling
- Images that resize appropriately
- Menus that work on small screens
- Make adjustments as needed using the following:
- Your theme’s responsive settings
- CSS media queries (if you know how to code)
- Mobile-specific settings in your page builder
Remember that mobile users often have different priorities than desktop users – make important information accessible without excessive scrolling.
Content Enhancement
Great design with poor content is like a beautiful car without an engine. Take time to polish your website copy:
Headlines and Subheadings
- Use clear, benefit-driven headlines
- Front-load important information
- Break up text with descriptive subheadings
- Include your target keywords naturally
Body Content
- Write in short paragraphs (2-3 sentences)
- Use active voice and conversational tone
- Include bullet points for scannable content
- Address the reader directly (“you” rather than “customers”)
Calls-to-Action
- Use command verbs that drive action
- Create urgency when appropriate
- Make buttons stand out visually
- Be specific about what happens next
Reading your content aloud helps identify awkward phrasing and long sentences. If you stumble while reading, your visitors will stumble while reading silently.
Need help with your brand’s visual identity? The experts at Inkbot Design can create a cohesive visual language that elevates your website above the competition.
Day 7: Pre-Launch Testing and Going Live

The final day is dedicated to thoroughly testing everything and preparing for launch. Rushing this step often leads to embarrassing errors that could have been easily caught.
Cross-Browser Testing
Different browsers may display your website differently. Test your site on:
- Chrome
- Firefox
- Safari
- Edge
Pay attention to:
- Layout consistency
- Font rendering
- Interactive elements (forms, menus, etc.)
- Loading times
Use the browser developer tools, accessed using an online VPN, to check for console errors that may indicate issues.
Functionality Testing
Methodically test all interactive elements:
- Click every link to ensure it leads to the correct destination
- Submit all forms to verify that they work, and notifications are received
- Test search functionality if your site has it
- Verify that the media (videos, audio) plays correctly
- Check that all integrations (social media, maps, etc.) function properly
Don’t forget to test user flows from start to finish. For example, complete a test purchase if you have an e-commerce site.
Speed Optimisation
Website speed affects both user experience and search rankings:
- Test your site speed using the following:
- Google PageSpeed Insights
- GTmetrix
- Pingdom
- Implement recommended improvements:
- Optimise image sizes
- Enable browser caching
- Minify CSS and JavaScript
- Reduce server response time
- Consider a Content Delivery Network (CDN)
Most WordPress caching plugins (like WP Super Cache or W3 Total Cache) can help implement many optimisations with minimal technical knowledge.
SEO Final Touches
Before launch, ensure your site is search engine-friendly:
- Install and configure an SEO plugin like Yoast SEO or Rank Math
- Set up proper meta titles and descriptions for all important pages
- Check for adequate heading structure (H1, H2, H3)
- Verify internal linking between related content
- Create and submit an XML sitemap
- Set up Google Search Console and submit your sitemap
Security Measures
Protect your new website:
- Install a security plugin if you haven’t already
- Use strong passwords for all accounts
- Implement SSL (your host likely provides free Let’s Encrypt certificates)
- Set up regular backups
- Keep all software updated
Launch Checklist
Before making your site public, verify the following:
- All placeholder content has been replaced
- Contact information is accurate
- Legal pages are in place
- Favicon is uploaded
- The 404 error page is customised
- Analytics is properly configured
- The backup system is working
When everything checks out, you’re ready to launch! If your site was already accessible during development, you might need to:
- Remove any “coming soon” or maintenance mode plugins
- Notify relevant audiences about your new website
- Submit your site to search engines (though they’ll find it naturally through links)
After Launch: Ongoing Maintenance and Growth

Having a website is a journey, not a destination. To ensure your site remains effective:
Regular Maintenance
- Update WordPress core, themes, and plugins promptly
- Monitor security logs for suspicious activity
- Check and fix broken links periodically
- Review and update content for accuracy
- Test contact forms and other functionality monthly
Analytics and Improvement
- Review Google Analytics data to understand visitor behaviour
- Use heatmap tools like Hotjar to see how people interact with your pages
- Gather feedback from users
- A/B test important pages to improve conversion rates
- Gradually improve page speed and performance
Content Growth
- Add new content regularly, if relevant (e.g., blog posts, portfolio items).
- Update existing content to keep information current
- Create content that addresses questions from your customers
- Expand into relevant content areas based on analytics insights
Promotion and Marketing
Your website won’t attract visitors on its own. Consider:
- Social media promotion
- Email marketing
- Search engine marketing
- Content partnerships with related sites
- Guest posting on industry blogs
Frequently Asked Questions
Do I need to know coding to build a website from scratch?
Not necessarily. You can create professional websites without coding knowledge using website builders like Wix or CMS platforms like WordPress. However, basic HTML/CSS familiarity helps when you need customisations beyond what templates offer.
How much does it cost to build a website from scratch?
The essentials (domain and basic hosting) cost around £50-£100 per year. Add £0-100 for themes/templates and possibly £0-200 for premium plugins. Website builders have monthly subscriptions ranging from £10-40/month. Custom development starts at several hundred pounds.
Is WordPress suitable for beginners?
Yes, WordPress is beginner-friendly and offers ample room for growth. Its massive community means you’ll find tutorials, plugins, and support for almost anything you want to accomplish.
Should I hire a professional to build my website or do it myself?
Building it yourself is feasible if you have time to learn and your needs are relatively standard. Consider hiring professionals like Inkbot Design for complex functionality, custom design needs, or when your time is better spent elsewhere in your business.
How can I ensure my website appears in Google search results?
Focus on creating quality content that answers questions people are searching for. Ensure technical SEO basics (proper meta tags, fast loading, mobile-friendly) and build credibility through backlinks from other sites. SEO is a long-term process, not an overnight result.
Can I switch from a website builder to WordPress later?
Yes, but it’s not always straightforward. Most website builders don’t offer complete export options, so you may need to recreate content manually. If future flexibility is essential, starting with WordPress might save hassle later.
How do I create a mobile-friendly website?
Most modern WordPress themes and website builders are responsive by default. Test your site on various devices and make adjustments as needed. Prioritise readable text sizes, adequate tap targets, and simplified navigation for mobile users.
What’s the difference between WordPress.com and WordPress.org?
WordPress.org is the self-hosted version offering complete control and customisation, but requires separate hosting. WordPress.com is a commercial service that includes hosting, but it limits customisation unless you pay for its expensive business plans. For most business websites, WordPress.org is the preferred option.
How do I back up my website?
Use backup plugins like UpdraftPlus or services like BlogVault to create regular, automated backups stored off-site (not just on your hosting server). Test the restoration process periodically to ensure your backups are working properly.
How often should I update my website?
Security updates should be applied immediately. Content should be reviewed at least quarterly. A complete design refresh typically occurs every 2-5 years, depending on your industry and the rate at which design trends evolve.
Is it essential to have an SSL certificate?
Absolutely essential. SSL certificates (making your site https rather than http) protect user data, build trust, and are a ranking factor for search engines. Most hosts offer free Let’s Encrypt certificates that renew automatically.
What’s the best way to create a logo for my new website?
For professional results that truly represent your brand, work with experienced designers at Inkbot Design. If the budget is limited, services like Canva offer templates to create something basic.
Your Web Development Journey Begins
Building a website from scratch in 7 days is an achievement worth celebrating. You’ve created something that works for you around the clock, connecting your business or passion with people worldwide.
Remember that websites are never truly “finished.” The most successful sites evolve continuously based on user feedback, changing goals, and emerging technologies. Set a calendar reminder to review your site quarterly and make incremental improvements.
If you get stuck along your website journey, remember there’s a vast community of fellow website builders happy to help. From WordPress forums to YouTube tutorials, you’re never more than a search away from solving almost any website challenge.
Now stop reading and start building – your perfect website awaits! Whether you code it yourself or web-build it with blocks, the key is to begin.

