Top 10 Wireframing Tools: Your Gateway to Better Design
Ever get that feeling that you’re fumbling in the dark, starting on a new design project?
You are not alone.
That is where wireframing tools come in handy; they will be that trusty torch that will lead you through the murky design waters to map your ideas before diving deep.
However, this article will discuss the top 10 wireframing tools that help designers and developers create better designs.
Digital wonders that will help you visualise your next big idea – a swanky new website or even a game-changing app – come alive with these!
So, get ready, grab a cuppa, and let’s jump into the fray!
- Wireframing is the essential blueprint stage that clarifies structure, saves time, and improves communication before visual design.
- AI now accelerates wireframing, generating layouts, microcopy, and multiple concepts so designers act as curators rather than starting from scratch.
- Choose tools by role and fidelity: Lo‑Fi for ideation, Mid‑Fi for team reviews, Hi‑Fi for testing and handoff; Figma remains the versatile go‑to.
What’s All the Fuss About Wireframing?
Before we jump into our top picks, let’s chat about why wireframing is such a big deal.
The Blueprint of Design
Think of wireframes as the architectural blueprint of your digital project.
It’s the skeleton upon which you’ll build your masterpiece. As you wouldn’t start building a house without a plan, you shouldn’t dive into design without a wireframe.
Why Bother with Wireframing?
- Clarity: It helps you see the big picture before you get lost in the details.
- Efficiency: Spot and fix issues early, saving time and resources.
- Communication: Share your vision with clients and team members easily.
- Focus: Keep the user experience at the forefront of your design.
The 2026 Shift: Generative AI in the Wireframing Workflow
By 2026, wireframing has evolved from manual box-drawing to a collaborative effort between humans and Generative Design AI. Modern tools no longer just provide a canvas; they provide a co-pilot.
How AI is Changing the Game
The introduction of tools like v0.dev, Galileo AI, and Figma’s AI suite has shifted the designer’s role from “creator” to “curator.” Instead of starting with a blank page, you can now input a prompt such as: “Create a low-fidelity wireframe for a fintech dashboard with a dark mode toggle and transaction history.”
The system then generates multiple structural options, allowing you to focus on the User Journey and Information Architecture rather than on button alignment.
When to Use AI for Wireframing
- Rapid Prototyping: When you need to show a client five different layout concepts in thirty minutes.
- Overcoming Blank Page Syndrome: Using AI to generate a baseline structure that you then refine.
- Automating Micro-Copy: AI plugins now automatically fill wireframes with realistic UX writing, rather than the “Lorem Ipsum” that often confuses stakeholders.
Key Entity Spotlight: Relume has become the industry standard for AI-powered site mapping and wireframing, allowing teams to export entire sitemaps directly into Figma as fully editable wireframe components.
The Different Levels of Wireframe Fidelity
Not all wireframes are created equal. In the design world, we talk about fidelity—a fancy way of describing how closely your wireframe matches the final, polished product.
Choosing the right fidelity level at the right time prevents “scope creep” and keeps your team focused on what actually matters: the user experience.
| Fidelity Level | Best For… | Visual Style | Key Goal |
| Low-Fidelity (Lo-Fi) | Brainstorming & Ideation | Rough sketches, boxes, lines | Speed and basic structure |
| Mid-Fidelity (Mid-Fi) | Team Reviews & Validation | Greyscale, real text, grids | Layout and information hierarchy |
| High-Fidelity (Hi-Fi) | Stakeholder Buy-in & Handoff | Full colour, branding, images | Realism and final approval |
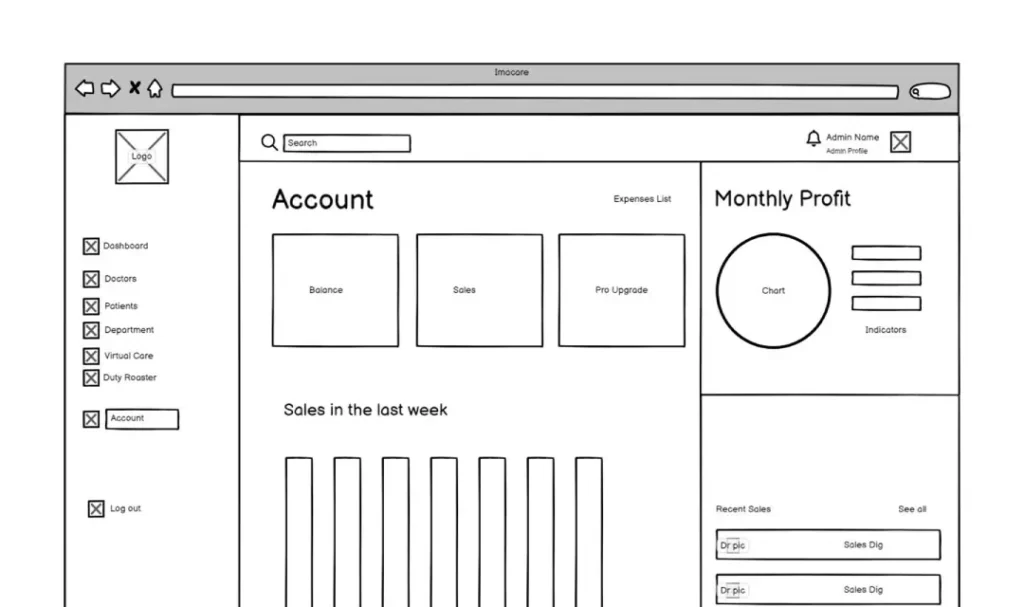
1. Low-Fidelity (Lo-Fi): The “Napkin Sketch”
Think of a Lo-Fi wireframe as a sketch on the back of a beer mat. It is rough, ready, and focuses entirely on the “Big Idea.” At this stage, you aren’t a designer; you’re an architect mapping out where the walls go.
- Visuals: Simple placeholders (boxes with an ‘X’ for images), basic lines, and “Lorem Ipsum” text.
- The Vibe: Quick and “dirty.” No colours, no fancy fonts, and zero distractions.
- Why use it? It’s the fastest way to get your initial thoughts down without getting bogged down in pixels. If an idea doesn’t work, you can bin it in seconds without feeling “attached” to the work.
2. Mid-Fidelity (Mid-Fi): The Digital Blueprint
This is a step up into the digital realm. You’re starting to put some meat on the bones. The layout is more precise, and the proportions start to resemble a real screen.
- Visuals: Greyscale (shades of grey), consistent spacing, and often real headings or UI text instead of scribbles.
- The Vibe: Clean and professional but still “unfinished.”
- Why use it? Mid-Fi is the “sweet spot” for most internal team reviews. It’s detailed enough to show the Information Architecture (IA) and user flow, but because it lacks branding, stakeholders won’t get distracted by the choice of blue vs. teal.
3. High-Fidelity (Hi-Fi): The “Digital Twin”
This is the full works—the closest thing to a “functional mirror” of your final app or website. In 2026, many Hi-Fi wireframes are actually interactive prototypes that users can click through.
- Visuals: Full-colour palettes, real high-res images, proper typography, and interactive hover states.
- The Vibe: “Is this a real app yet?” It looks and feels like the finished product.
- Why use it? Hi-Fi is essential for User Testing (to see how people react to the real UI) and for Developer Handoff. It leaves no room for guesswork—the developers know exactly what they need to build.
Pro Tip for 2026: Don’t skip straight to Hi-Fi. Starting too detailed makes you less likely to accept critical feedback because you’ve already invested hours into the “pretty” version. Validate the structure in Lo-Fi first.
Quick Comparison: Which Tool Fits Your Project?
| Tool | Primary Use Case | Best For | 2026 Pricing (Starting) | Key Entity / Tech |
| Figma | All-in-one UI/UX | Pro Teams & Enterprise | £12/user/mo | Dev Mode, AI Suite |
| Balsamiq | Rapid Lo-Fi | PMs & Stakeholders | £7/project/mo | Hand-drawn Style |
| Penpot | Open-source Design | Dev-heavy Teams | Free / Self-hosted | SVG/CSS Native |
| Axure RP | High-fidelity Logic | Enterprise SaaS | £22/user/mo | Conditional Logic |
| Framer | High-end Interaction | Marketing Sites | £15/site/mo | React-based |
| Miro | Brainstorming | Remote Workshops | Free (Limited) | Infinite Canvas |
The Cream of the Crop: Our Top 10 Wireframing Tools
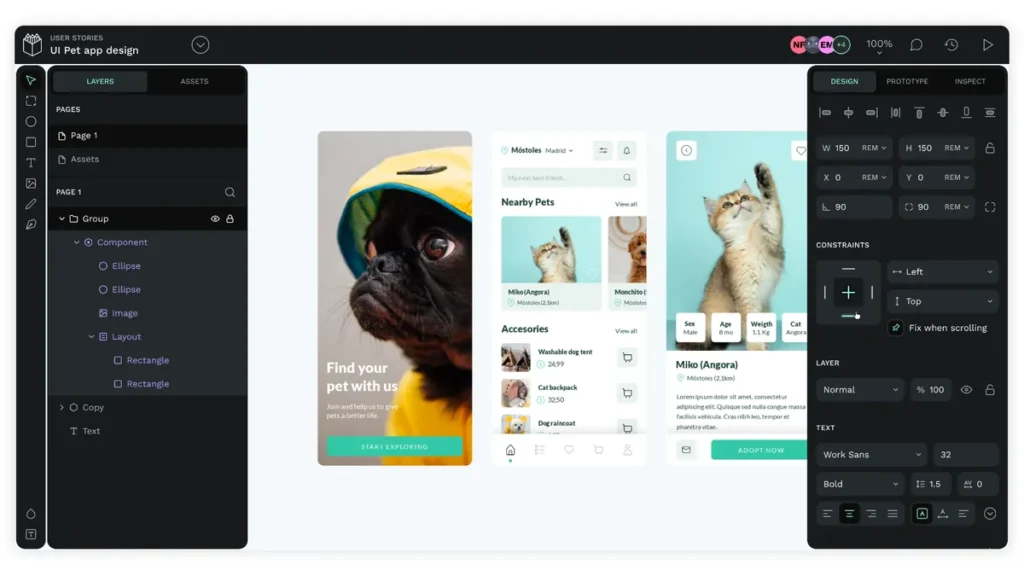
1. Figma: The Jack of All Trades

Figma has taken the design world by storm, and for good reason. It’s like the Swiss Army knife of design tools – versatile, powerful, and always there when needed.
Key Features:
- Real-time collaboration: Work with your team as if you’re in the same room.
- Browser-based: No need to download hefty software.
- Responsive design: Create layouts that adapt to different screen sizes with ease.
- AI-powered plugins and widgets: The Figma community is chock-full of clever AI plugins. These little helpers can write your UI text, generate layouts, or find the right icons for you, which means you can spend less time on the fiddly bits and more time on the actual design thinking.
- Extensive plugin library: Customise your workflow to your heart’s content.
Pros:
- Seamless teamwork
- Works on any operating system
- Constantly updated with new features
Cons:
- Requires a stable internet connection
- It can be overwhelming for beginners
Figma is like that friend who’s good at everything – it might make you feel a bit inadequate at first, but once you get to know it, you’ll wonder how you ever lived without it.
2. Sketch: The Mac Maestro
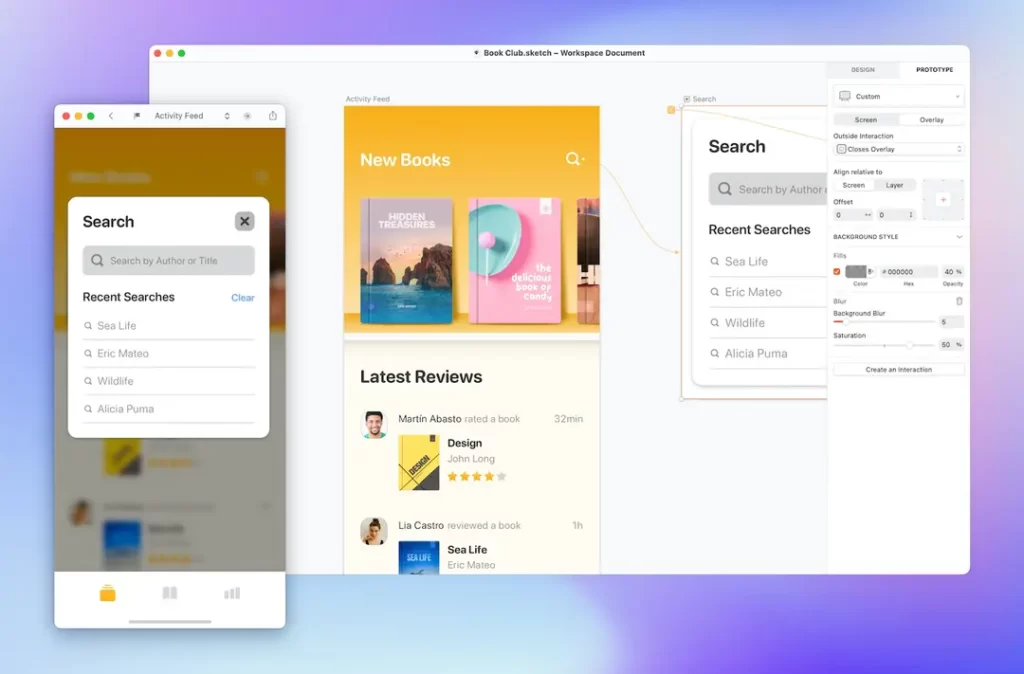
If you’re a Mac user, Sketch might just be your new best friend. It’s been a designer favourite for years, and it’s not hard to see why.
Key Features:
- Vector editing: Create scalable designs with ease.
- Symbols: Reuse elements across your designs for consistency.
- Plugins galore: Extend Sketch’s functionality to suit your needs.
- Prototyping: Bring your wireframes to life with interactive elements.
Pros:
- Intuitive interface for Mac users
- Extensive community and resources
- Excellent for icon and logo design
Cons:
- Mac-only (sorry, Windows and Linux users!)
- Requires a paid license
Sketch is like a well-tailored suit – it might not fit everyone, but for those it does, it’s perfect.
3. Penpot: The Open-Source Powerhouse
If you want the power of Figma but with the freedom of open-source software, Penpot is the industry’s answer.
It is the first design and wireframing platform to use SVG as its native file format, making it a darling among developers.
- Key Features: Flex Layout (based on CSS Flexbox), Grid Layout, and the ability to self-host on your own servers.
- Why it wins in 2026: It removes the “vendor lock-in” fear. Your files aren’t trapped in a proprietary format.
- Ideal for: Government projects, privacy-conscious startups, and developer-centric teams.
4. Balsamiq: The Rapid Sketching Star
Sometimes, you must get your ideas down quickly without fussing over details. That’s where Balsamiq shines.
Key Features:
- Sketch-like interface: It feels like you’re drawing on a whiteboard.
- Quick add: Drag and drop UI elements from a built-in library.
- Low fidelity: Keeps the focus on structure and layout rather than aesthetics.
- Project linking: Connect different wireframes to create a user flow.
Pros:
- Super fast to learn and use
- Encourages focus on functionality over form
- Great for non-designers to communicate ideas
Cons:
- Limited in terms of creating high-fidelity mockups
- Not suitable for complex interactions
Balsamiq is like a quick coffee chat with a colleague – it’s informal, efficient, and does the job without fuss.
5. Axure RP: The Prototyping Powerhouse
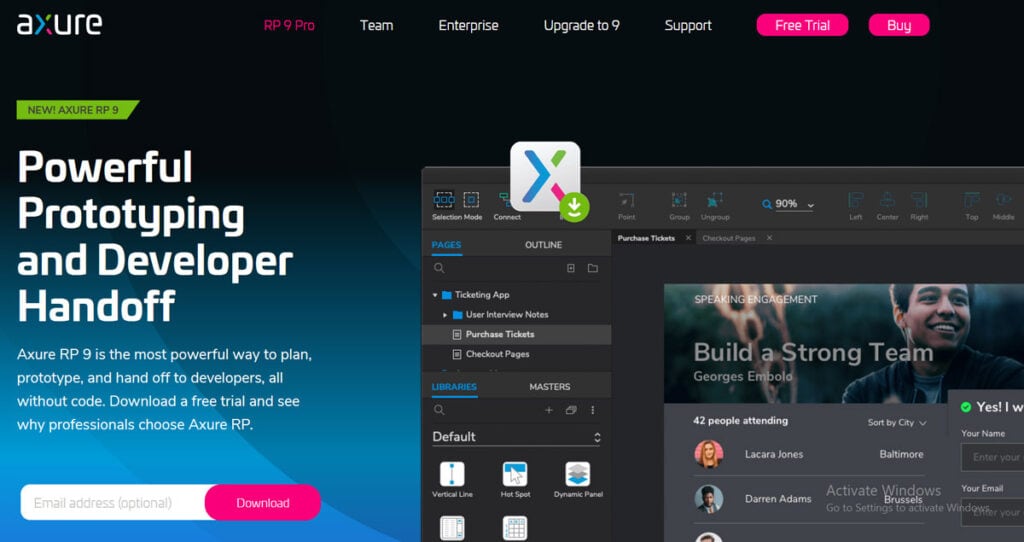
When you need to create complex, interactive prototypes, Axure RP is your go-to tool.
Key Features:
- Advanced interactions: Create complex user flows and dynamic content.
- Adaptive views: Design for multiple screen sizes in one file.
- Math functions: Use calculations in your prototypes for data-driven designs.
- Documentation: Automatically generate developer specs.
Pros:
- Unmatched in terms of prototype complexity
- Great for large, enterprise-level projects
- Powerful for both UX and business analysts
Cons:
- Steep learning curve
- It can be overkill for simple projects
Axure RP is like a high-end sports car – it might be more than you need for a quick shopping trip, but nothing else will do when you need power and precision.
6. Framer: From Wireframe to Website
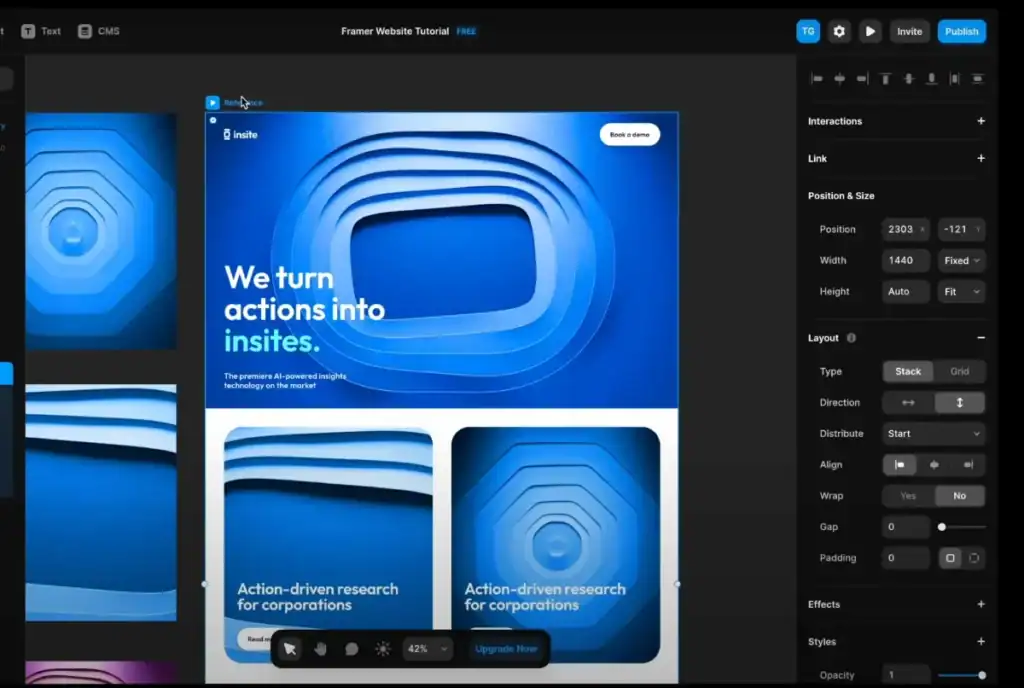
Framer has pivoted to become the ultimate tool for designers who want to ship.
It’s no longer just a prototyping tool; it’s a site builder.
You can start with a rough wireframe and gradually evolve it into a live, responsive website.
- Key Features: High-end animations, CMS integration, and “Framer AI” for layout generation.
- Pros: The most realistic interactions of any tool on this list.
- Cons: Higher learning curve if you’re only looking for simple boxes and lines.
7. Moqups: The All-in-One Web App
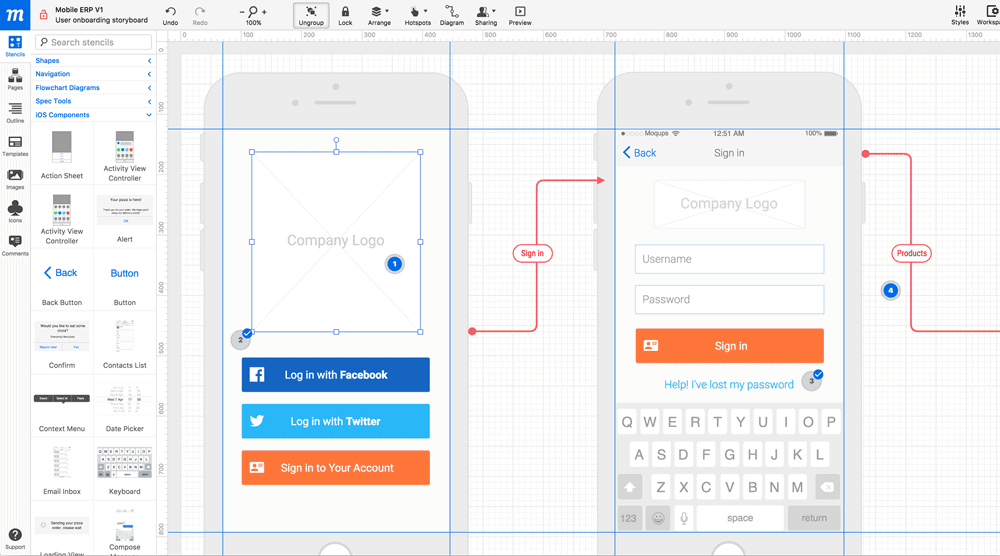
Moqups offers a comprehensive solution for all stages of the design process, from wireframing to prototyping.
Key Features:
- Diagram tools: Create flowcharts and sitemaps alongside wireframes.
- Page templates: Get started quickly with pre-made layouts.
- Collaboration features: Work with your team in real time.
- Style guide: Maintain consistency across your designs.
Pros:
- No software to install – works in your browser
- Covers multiple aspects of the design process
- Affordable pricing for small teams
Cons:
- It is less potent than some specialised tools
- Can be slow with massive projects
Moqups is like a Swiss Army knife for web design – it might not be the best at everything, but it’s convenient to have around.
8. Wireframe.cc: The Minimalist’s Dream
Sometimes, less is more. Wireframe.cc takes this philosophy to heart, offering a stripped-down, no-frills wireframing experience.
Key Features:
- Minimal interface: Distraction-free design environment.
- Limited colour palette: Keeps you focused on structure, not aesthetics.
- Quick share: Generate a link to your wireframe with a single click.
- Responsive canvas: Design for different screen sizes quickly.
Pros:
- Extremely easy to learn and use
- Perfect for quick, rough sketches
- Free for basic use
Cons:
- Limited features compared to more comprehensive tools
- Not suitable for detailed or high-fidelity wireframes
Wireframe.cc is like a napkin sketch in digital form – it’s perfect for those moments when inspiration strikes and you need to get your ideas down fast.
9. UXPin: The Design-to-Code Dynamo

UXPin bridges the gap between design and development, offering a unique approach to wireframing and prototyping.
Key Features:
- Code components: Use actual code components in your designs.
- Expressions: Add conditional logic to your prototypes.
- Design systems: Create and maintain a cohesive design language.
- Accessibility features: Ensure your designs are inclusive from the start.
Pros:
- Creates more realistic prototypes
- Helps designers and developers speak the same language
- Excellent for maintaining design consistency
Cons:
- It can be complex for those not familiar with coding concepts
- More expensive than some alternatives
UXPin is like a translator between the design and development worlds – it helps everyone better understand each other.
10. Whimsical: The Quick and Quirky Option
Last, we have Whimsical – a tool that makes wireframing feel less like work and more like play.
Key Features:
- Mind mapping: Brainstorm ideas before diving into wireframes.
- Flowcharts: Map out user journeys with ease.
- Sticky notes: Collect and organise ideas quickly.
- Real-time collaboration: Work together with your team seamlessly.
Pros:
- Fun and intuitive interface
- Covers multiple aspects of the planning process
- Great for visual thinkers
Cons:
- Less suitable for highly detailed wireframes
- Limited customisation options
Whimsical is like a playground for your ideas – a place where creativity can run wild and free.
11. Miro: The Collaborative Whiteboard Wizard

Miro isn’t your traditional wireframing tool, not really.
It’s more of a massive, online collaborative whiteboard.
But, look, for those early, messy stages of a project where ideas are flying about, it’s an absolute game-changer.
It’s perfect for mapping out user flows and chucking together low-to-mid-fidelity wireframes with the whole team at once.
Key Features:
- Infinite collaborative canvas: A huge digital space where your team can all work together in real-time.
- Extensive template library: The Miroverse is packed with pre-made templates for everything from wireframes to customer experience maps.
- Real-time collaboration: You can see everyone’s cursors, leave comments, and even vote on ideas.
- Integrations with popular tools: It plays nicely with things like Jira, Slack, and Sketch, so it fits into your existing workflow.
Pros:
- Brilliant for remote workshops and getting everyone’s ideas out.
- Super flexible for all sorts of design tasks, not just wireframes.
- So easy to use that even non-designers can get stuck in.
Cons:
- Not the right tool for creating polished, high-fidelity prototypes.
- It can feel a bit unstructured compared to dedicated UI design tools.
Miro is like a bustling workshop where every team member has a workbench – it’s a bit chaotic, but it’s where raw ideas are collaboratively hammered into shape.
Choosing the Right Tool for You
Now that we’ve taken a whirlwind tour of the top wireframing tools, you might wonder which one is right for you. Well, as with most things in life, it depends.
Consider Your Needs
Ask yourself these questions:
- What’s your budget?
- How complex are your projects?
- Do you need collaboration features?
- Are you designing for web, mobile, or both?
- How important is integration with other tools?
Matching Tools to Your Role
Look, the “best” tool really depends on who you are and what you’re trying to do.
A tool that’s perfect for a designer might be total overkill for a project manager.
For Product Managers & Stakeholders
Your job is to communicate the vision, fast.
You need tools that are quick and clear.
Something like Balsamiq or Wireframe.cc is spot on for knocking out simple ideas and user flows without getting lost in the weeds of design.
Miro and Whimsical are also fantastic because they let you brainstorm and map things out visually with the team.
For UX/UI Designers
Right, this is your bread and butter.
You need a powerhouse.
Honestly, Figma has become the industry go-to for a reason.
Its collaboration features, component libraries, and prototyping are top-drawer.
If you’re a die-hard Mac user, Sketch is still a solid choice.
And if you’re building something with seriously complex interactions, Axure RP is the beast you need to tame.
For Developers
When it comes to the handoff from design to code, clarity is everything.
You don’t want to be guessing pixel sizes.
Figma’s Dev Mode is a godsend here, giving you all the specs, assets, and even bits of code you need.
UXPin is also excellent because it uses code-based components, which makes the whole process feel much more connected to the final build.
Try Before You Buy
Most of these tools offer free trials. Don’t be shy – spin them and see which feels right. It’s like dating, with less awkward small talk and more clicking around.
Keep an Open Mind
Remember, the “best” tool is the one that works best for you and your team. Don’t get caught up in what everyone else is using. You may fall in love with the simplicity of Wireframe.cc, or the power of Axure RP may woo you.
The Future of Wireframing

As we wrap up our journey through the world of wireframing tools, let’s take a moment to gaze into our crystal ball and ponder what the future might hold.
AI-Assisted Design
Artificial Intelligence is making waves in every industry, and design is no exception. We already see tools that can generate layout suggestions based on your content. In the future, we might have AI assistants that can generate entire wireframes from a simple text description.
Virtual Reality Wireframing
As VR and AR technologies evolve, we might see wireframing tools allowing us to sketch 3D spaces and interfaces. Imagine walking through your website design before a single line of code is written!
More Integration
The line between wireframing, prototyping, and development will become even blurrier. We might see tools that can generate basic code from our wireframes, making the handoff to developers even smoother.
Accessibility-First Design
As the importance of inclusive design continues to grow, we’ll likely see more tools incorporate accessibility features from the wireframing stage onward. This could include features such as automatic contrast checking and screen reader simulations.
Wrapping Up
Wireframing is more than just a step in the design process – it’s a superpower. It allows us to experiment, iterate, and communicate our ideas quickly and effectively. Whether you’re a seasoned pro or just starting, there’s a wireframing tool out there that’s perfect for you.
Remember, the tool is just that – a tool. The real magic happens in your imagination. So, go forth, experiment, and create amazing things. Your users will thank you for it.
And who knows? The next best wireframing tool is waiting to be invented. By you?
Frequently Asked Questions
Can I use Figma for free for wireframing?
Yes, Figma offers a robust “Starter” plan that allows three files and unlimited collaborators. It is perfect for individual freelancers or students, though teams will eventually need the “Professional” tier for unlimited files and library sharing.
Which wireframing tool is best for mobile apps vs. websites?
For mobile apps, Sketch and Figma are superior due to their built-in device templates and easy mirroring to physical phones. For complex, data-heavy websites or SaaS dashboards, Axure RP provides the conditional logic (e.g., “if user is logged in, show X”) that others lack.
Do I need a stylus or Apple Pencil for wireframing?
While not required, tools like Whimsical and Miro are excellent on tablets. Using a stylus creates a “digital whiteboard” feel that mimics the speed of pen and paper while keeping files digital and shareable.
What is the difference between a wireframe and a mockup?
Is Adobe XD still a viable choice in 2026?
Since Adobe’s pivot toward Figma, XD has entered “maintenance mode.” While it still functions for those with legacy Creative Cloud subscriptions, we recommend new projects start in Figma or Penpot to ensure long-term support and plugin availability.

