Your Product Photography Looks Cheap: 10 Fixes for Brands
Most product photography is dreadful.
It’s not because people are using the wrong camera. It’s not because they don’t have a thousand-pound lighting kit. It’s because the thinking behind the photos is fundamentally flawed.
Your product photos are an argument. They are the visual evidence for why someone should choose you. Right now, your argument is probably weak.
The good news? Fixing it isn’t about spending more money. It’s about making better decisions. These ten points are the difference between looking like an amateur in a marketplace and looking like an intentional, serious brand.
- Your product photos must reflect honesty; avoid staged or unrealistic lifestyle shots that mislead customers.
- Master one soft light source to enhance your images; bad lighting can ruin expensive products’ appearances.
- Establish a consistent visual style across all images to build trust and professional brand identity.
1. Stop Lying with “Lifestyle” Shots

This is a personal pet peeve. The bottle of hot sauce was artfully placed next to a pair of headphones and a succulent plant on a pristine white desk.
Who lives like this? Nobody.
The Problem with Fake Scenarios
This kind of “lifestyle” photography doesn’t communicate a lifestyle. It communicates a fantasy. It screams, “We read a blog post about props and went a bit mad.” It’s dishonest, and frankly, it insults your customer’s intelligence. They know it’s a lie.
The goal of a lifestyle shot is to place the product in its natural habitat to create a moment of recognition in the customer’s mind.
The Brutally Honest Fix
Show the product where it actually belongs.
If you sell coffee beans, show them next to a grinder and a cafetière on a real kitchen counter. If you sell hiking boots, get them muddy and photograph them on a trail.
Help the customer imagine the product in their life, not a sterile, nonsensical stock photo life. The best lifestyle shots aren’t staged; they’re documented.
- Shoot in the product’s real-use space: kitchen, trail, workshop.
- Include only props that prove use, not random décor pieces.
- Show honest signs of use, steam, crumbs, scuffs, when relevant.
- Keep the product largest and sharpest; it must read first.
- Do a squint test; if props win, remove them.
2. Your Lighting is an Afterthought
“Just use natural light from a window.”
This is the laziest, most common piece of advice in product photography. It’s not a strategy. It’s a platitude.
“Just Use a Window” Isn’t a Strategy
What kind of light? Direct, harsh midday sun that creates ugly, sharp shadows? The gloomy, blue-ish light of a miserable, overcast Tuesday?
Bad lighting is the fastest way to make an expensive product look cheap. It creates strange colour casts, hides essential details, and makes textures look flat. It’s a complete non-starter.
The Fix: Master One Simple Light Source
Forget complicated, Hollywood-style three-point lighting setups. You don’t need them yet.
Instead, master one significant, soft light source. That’s it.
- Option A: A large window on an overcast day or a window with a thin white curtain to diffuse the light.
- Option B: A single, affordable softbox light.
Position your product, place your light source to one side, and then take a simple piece of white card or foam board and put it on the opposite side. This will bounce light back, softening the shadows.
That single setup is responsible for 90% of all great product photography. Master it.
Kill Glare with a Circular Polariser
Direct Answer: A circular polariser, CPL, is a front‑of‑lens filter that cuts glare on non‑metallic surfaces and deepens colour. You rotate it to tune the effect, it costs light, and it makes labels, glass, and glossy plastics readable and rich.
- Rotate the CPL until reflections fade on the glass and varnish.
- Expect 1 to 2 stops of light loss, raise ISO or add light.
- Use it on bottles, screens, and shiny packaging, not bare metal.
In our fieldwork, a £20 CPL fixed unreadable syrup labels in minutes. No camera upgrade did that. You just removed the glare the right way.
3. You’re Hiding the Product in a Sea of Props

If I can’t figure out what you’re selling within three seconds, you’ve failed.
The “More is More” Fallacy
This is another cardinal sin. The product—the one thing you’re actually trying to sell—is drowning in a chaotic mess of props. Dried flowers, random trinkets, textured cloths, bits of wood… It’s just visual noise.
A cluttered background doesn’t make the shot look premium. It makes you look like you have zero confidence in your product. It forces the customer’s eye to dart around, confused.
The Fix: The One-Thing Rule
Every single item in your photograph must have a clear purpose. Before placing a prop, ask yourself one question: What job is this doing?
- Does it demonstrate scale?
- Does it explain how the product is used?
- Does it speak directly to a key ingredient or material?
If you can’t justify its existence in a straightforward sentence, eliminate it. The product is the hero—end of discussion.
4. Inconsistency is Killing Your Brand
Go to your main e-commerce shop page. Or your Instagram grid. Now, squint your eyes.
Does it look like a cohesive, unified collection? Or does it look like a jumble sale?
The Hodgepodge Grid
For most brands, it’s the latter. One photo is dark and moody, and the next is bright and airy. The backgrounds are all different. The editing styles are all over the place.
This visual chaos screams “amateur.” It erodes trust at a subconscious level. If you can’t get your presentation straight, your product or service may be disorganised.
The Fix: Create a Visual Mandate
Before you shoot another photo, create a set of rules—a simple style guide for your photography.
- Background: Decide on one primary background colour or texture. Have one or two complementary options for variety, but no more.
- Lighting: Use the same lighting setup for all your primary shots. That one soft light source we talked about? Use it—every time.
- Editing: Apply a simple editing preset in Lightroom or your preferred app to every photo.
- Aspect Ratio and Framing: Pick one primary ratio, 1:1 or 4:5, and keep equal margins and camera height so your grid reads as one set. Apple and IKEA product pages prove how steady framing builds recognition.
- File Management: Name files to SKUs, SKU_view_variant.jpg, so sets stay aligned and updates take minutes, not hours.
This isn’t about being boring. It’s about being recognisable. It’s a fundamental piece of your brand identity. When every image feels like it came from the same world, you build authority.
Straight Talk: Fixing your photos is one thing. Ensuring they align with your entire brand strategy is another. If you’re struggling to build that cohesive identity, that’s where we come in. Explore what a professional branding service actually involves.
5. You’re Scared of a White Background

“But it’s so boring.”
That’s the common complaint. It’s also completely wrong. A white background isn’t boring; it provides absolute clarity.
“But It’s So Boring…”
Let’s put this idea in the bin, shall we?
A clean, pure white background is the most effective e-commerce setting. It’s the standard for giants like Amazon for a very good reason. It removes all distractions. It shows the product’s true colours. It puts 100% of the focus on the item for sale.
Your creative, styled shots have their place. But they are not your main workhorse image.
The Fix: Perfect the Packshot First
You need a perfect “packshot” on a seamless white background for every product you sell. No props. No fancy lighting. Just the product, shown clearly.
The Setup That Delivers True White
Use a seamless white sweep that curves with the background, with no horizon line. Pull the product off the background by 30 to 60 cm to cut spill and give you room to light cleanly.
Light the background slightly brighter than the subject, about one stop, to hit pure white without blowing edges. Check the histogram; whites should clip only in the background, not on the product.
Amazon’s main image rule requires pure white, RGB 255,255,255, for the background, see Amazon Seller Central guidelines. That standard trains shoppers. Apple’s store imagery set the benchmark for clear white packshots years ago; buyers now expect this level out of the box.
I once audited a catalogue where backgrounds varied between 230 and 255. Raising the sweep by one stop and separating the subject cut retouch time by half.
This is your visual foundation. It’s the most useful, versatile photo you will own. It can be used in your shop, on marketplaces, in catalogues, and by the press. Get this one image right before you even dream of doing anything else.
A 2021 study found that 76% of product photos for top online retailers used a plain background, with white as the overwhelming favourite. [Source] They do this because it works.
6. Your Angles Are All Wrong
Think about how you take most photos in your daily life. You’re standing up, pointing your phone down at the subject.
This is the worst possible way to photograph a product.
The View from Nowhere
That lazy, top-down-ish angle distorts an object’s proportions. It makes it look squat and insignificant. It feels accidental, like a quick snap rather than a considered photograph. It’s an angle that doesn’t exist in a professional catalogue.
The Fix: Get on the Product’s Level
Treat the product with some respect. Put your camera on a tripod (even a cheap one) and get it on the same level as your product.
Your standard set of angles for any product should be:
- Straight-on: The camera lens is at the midpoint of the product.
- 45-degree Angle: Shows the front and side.
- Top-Down (Flat Lay): Only if the product makes sense from this view.
- Detail Shot: A close-up of a key feature.
Use Natural Perspective, 50 mm Equivalent
Avoid ultra‑wide lenses up close; they stretch shapes and lie. Use a “normal” focal length, around 50 mm full‑frame equivalent, for honest proportions. On phones, pick the 2x or 3x camera, not the ultra‑wide, and keep the faces of the product parallel to the sensor.
These four shots provide a comprehensive, honest view of the product. No weird distortion. No lazy snapshots.
7. You’re Not Editing (Or You’re Over-Editing)
There are two equally damaging crimes in photo editing. Doing nothing and doing way too much.
The Instagram Filter Catastrophe
Slapping a heavy, trendy filter on your product photos is a death sentence. It instantly cheapens your brand. More importantly, it alters the colour of your product, which is a fast track to customer complaints and returns. According to a 2022 survey, 22% of online returns are due to the product looking different in person. [Source] You can bet bad editing is a major contributor.
Doing nothing is just as bad. A raw photo from the camera is often flat, a bit grey, and lacks impact.
The Fix: The Subtle Art of the Tweak
Photo editing for products isn’t about transformation. It’s about accuracy and enhancement.
Your entire editing process can be boiled down to four simple adjustments:
- White Balance: Make sure the whites are pure white, not yellow or blue.
- Exposure: Ensure the image is bright enough but not blown out.
- Contrast: Add a small amount of contrast to make the image “pop.”
- Sharpening: Add a touch of sharpening to bring out the details.
That’s it. Create a preset with these basic adjustments and apply it to every photo. The goal is consistency and realism, not cinematic drama.
Colour Management: Shoot RAW, Export sRGB
Shoot RAW, DNG or ProRAW for wider editing latitude. Most cameras record 12 or 14‑bit RAW, and JPEG is 8‑bit, per Adobe documentation. Edit on a calibrated display, then export to sRGB with the ICC profile embedded. MDN confirms sRGB is the web’s default colour space.
Pick JPEG for broad support or AVIF and WebP for smaller files at comparable quality. Google Chrome Developers recommend modern formats to improve page speed and Largest Contentful Paint, which helps conversion on slow connections.
The State of Product Images in 2026
Modern browsers, Chrome, Safari, and Edge, honour embedded profiles and support WebP and AVIF by default. That means fewer colour shifts between devices and faster loads when you serve the right format. Most major commerce platforms have added automatic WebP or AVIF delivery; check your theme settings.
Debunked “Best Practice”: “Export Adobe RGB for richer web colour.” Wrong. sRGB is the assumed space on the web; W3C and MDN confirm it. Exporting Adobe RGB without conversion produces dull, desaturated images in many browsers.
8. You Ignore the Power of Detail
A customer in a physical shop can pick up your product. They can feel its weight, see its texture, and examine its finish.
Online, they can’t do any of that.
Selling the Big Picture, Forgetting the Small
Most brands only provide shots from a distance: the standard front-on, the standard side-on. You see the whole product, but you don’t know the product.
These generic shots don’t communicate quality. They don’t show the leather’s texture, the fabric’s weave, or the subtle engraving on the clasp. They fail to build the trust needed to justify a premium price.
The Fix: Get Uncomfortably Close
Get a macro lens for your camera, or use the macro mode on your phone. Now, get closer. Then, get closer again.
- Show the stitching on a wallet.
- Show the texture of a handmade ceramic mug.
- Show the fine print on a label.
- Show the thickness of the notebook paper.
Macro Precision: Focus Stacking for Detail
For razor‑sharp close‑ups, stack focus. Put the camera on a tripod, take a series from front to back, then blend in software that supports stacking, like Adobe Photoshop. Stopping down too far softens detail due to diffraction. Cambridge in Colour explains why small apertures reduce sharpness.
9. Your Shadows Look Like Mistakes
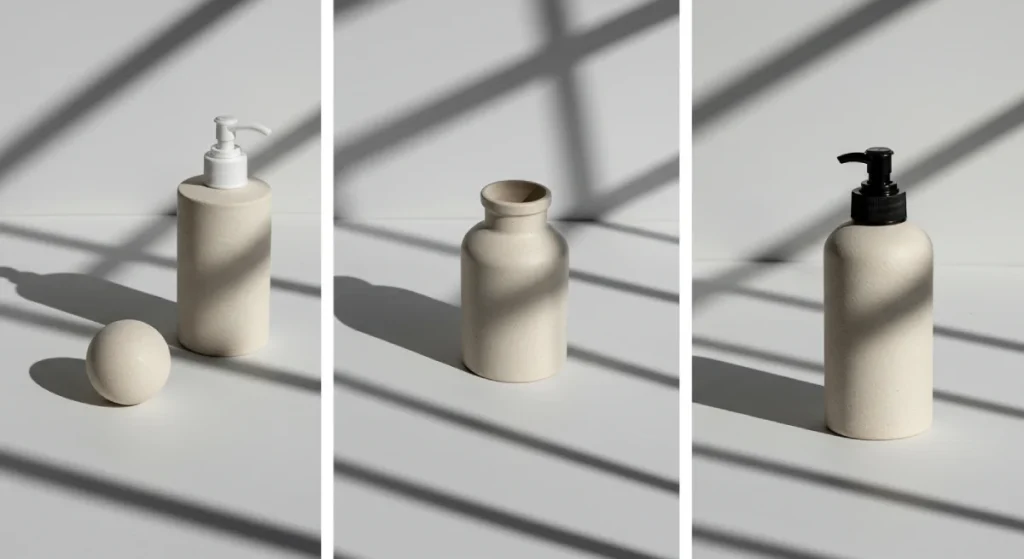
Shadows are a funny thing. Bad shadows make a product look awful. But no shadows can make a product look fake, like a bad cut-and-paste job.
The Muddy Blob
The most common mistake is the ugly shadow. It’s that dark, poorly defined, murky blob created by bad lighting. It doesn’t define the product; it clings to it, obscuring its shape and making the image look grubby.
The Fix: Make Shadows Intentional
Shadows are not your enemy. They are a tool. They give an object shape, dimension, and a sense of place.
The key is control.
- For most e-commerce shots, you want soft shadows. Use your large, diffuse light source to create gentle, soft-edged light grey shadows.
- For a stylistic, graphic shot, you might want a hard shadow. Use a direct, hard light source (like the sun or a bare bulb) to create a crisp, dark, well-defined shadow.
- Use reflectors and flags; white card lifts shadows; black card; negative fill; and deepens edges on pale products.
- Keep shadow direction and softness consistent across a range so sets feel intentional, not pasted.
Look at your shadow. Does it look like it was put there on purpose? Or does it look like an accident? That’s the only question that matters.
10. You Think Your Phone Isn’t Good Enough
I once sat with a client who had spent over £4,000 on a new camera and lens setup. Their product photos were still terrible. They were dark, poorly composed, and out of focus.
The problem wasn’t the box taking the pictures.
The Gear Acquisition Syndrome
Blaming your tools is the ultimate excuse. It’s a crutch for people who don’t want to learn the fundamentals.
Here’s the truth: a brand new, top-of-the-line camera will still produce garbage if you don’t understand light, composition, and styling. Your modern smartphone has a ridiculously powerful camera. It is more than capable of producing professional-level product photos for your website and social media.
The Fix: It’s the Brain, Not the Box
Stop looking at new cameras. It’s a waste of your time and money.
Instead, take your phone and obsess over mastering the first nine points on this list.
- Learn to control the light.
- Be ruthless with your props.
- Build a consistent style.
- Get your angles right.
- Learn basic, accurate editing.
- Use a tripod and a self‑timer or remote to kill shake.
- Lock focus and exposure, AE or AF lock, before you shoot.
- Keep ISO low, raise light, not gain, for cleaner files.
- Use the telephoto camera, 2x or 3x, and avoid digital zoom.
- When supported, shoot RAW or DNG on mobile for better edits.
You can even consider upgrading only once you have truly mastered all that and your business is making enough money that a new camera is a trivial expense.
Until then, the problem isn’t the phone in your hand. It’s the knowledge in your head.
So, Where Do You Go From Here?
There it is. Ten points. None of them requires a massive budget. They all require you to stop making excuses and think like a brand strategist, not just a product owner.
Stop blaming your gear. Stop overcomplicating it with props and filters.
Focus on three things: clarity, consistency, and honesty. Your photos aren’t just pictures on a screen; they’re the core of your visual argument. Don’t make a weak argument.
A Final Observation…
Getting your product photography right is crucial. But those photos need to exist within a strong, coherent brand. Even the best photos won’t save you if your logo, website, and messaging pull in different directions.
If you’re looking to build that overarching, powerful brand identity, that’s what we do. You can see our approach to branding services here.
When you’re ready to have a serious conversation about building a brand that lasts, request a quote.
Frequently Asked Questions (FAQs)
What is the best camera for product photography?
The one you already have. Seriously. Your smartphone is more than capable. Master the principles of lighting and composition before considering buying a dedicated camera. The photographer’s skill matters infinitely more than the gear.
Do I need a professional studio?
No. A designated corner of a room with a large window, a table, a white background (a large sheet of paper or board), and a piece of white foam board for bouncing light is all you need to start.
White background or lifestyle photos – which is better?
You need both. Start with a perfect, clean shot on a pure white background for your main e-commerce listings. Then, create realistic lifestyle shots (that aren’t lies) for social media and other parts of your website to show context.
Can I really use my iPhone for professional product photography?
Yes, 100%. Modern iPhones have incredible cameras. The key is to use a tripod to keep it steady, avoid using the digital zoom (move the phone closer instead), and use an app that gives you manual control over focus and exposure.
What’s the biggest mistake small businesses make with product photos?
Inconsistency. Photos with different lighting, backgrounds, and editing styles across your website look unprofessional and erode trust. Creating a simple, consistent visual style is the most impactful fix.
Do I need to show my product’s packaging in the photos?
Yes, if the packaging is a key part of the customer experience. An image of the product alongside its beautiful, branded box can increase perceived value.
How much should I budget for photo editing software?
You can start for free with apps like Snapseed. For more control and the ability to create and save presets for consistency, Adobe Lightroom is the industry standard and costs around £10 per month. It’s a worthwhile investment.
What props are safe to use?
Use props that either explain the product’s use (a coffee grinder for coffee beans), show its scale (a hand holding the product), or highlight an ingredient (a fresh lemon next to a lemon-scented cleaner). If the prop doesn’t have a clear job, remove it.
How can I make my shadows look better?
To make shadows softer and more professional, increase the size of your light source relative to the product. Move the light closer to the subject or diffuse it through a thin white sheet or a softbox. This wraps the light around the object and softens the shadow’s edges.
