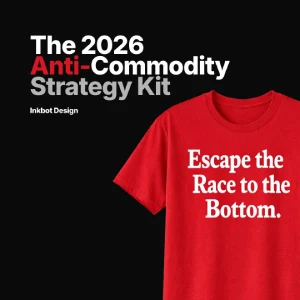
The 80/20 Product Photo Editing Guide: Focus on What Sells
You didn’t start a business to become a professional photo retoucher.
Yet here you are, hours deep into a YouTube tutorial on “frequency separation,” trying to remove a speck of dust from a product photo that’s probably not sell any more units because of your efforts.
The internet is flooded with advice that treats product photo editing like a fine art. It’s not. It’s a commercial task with a single goal: to sell your product.
Most entrepreneurs waste staggering amounts of time on complex editing techniques that have zero impact on their bottom line.
They’re caught in the Perfection Trap, tweaking and polishing an image until it looks like a plastic render, eroding customer trust.
The secret isn’t learning more Photoshop tricks. It’s learning fewer. This is the 80/20 rule of product photo editing: 80% of your sales impact will come from 20% of the editing tasks. This guide will show you what that 20% is.
- Editing product photos should focus on profitability, not perfection; clarity and consistency build customer trust.
- Prep work is essential: start with good lighting and be ruthless in culling poor images.
- Use the 80/20 rule: 80% of sales impact comes from 20% of editing tasks, focusing on essential adjustments.
- Consider outsourcing editing when volume is high or tasks are complex, allowing you to focus on growth.
The Goal Isn’t ‘Perfect Photos.’ It’s Profitable Photos.
The first thing you must do is burn the idea of “perfect” from your mind. A perfect photo is a myth. A profitable photo, however, is very real.
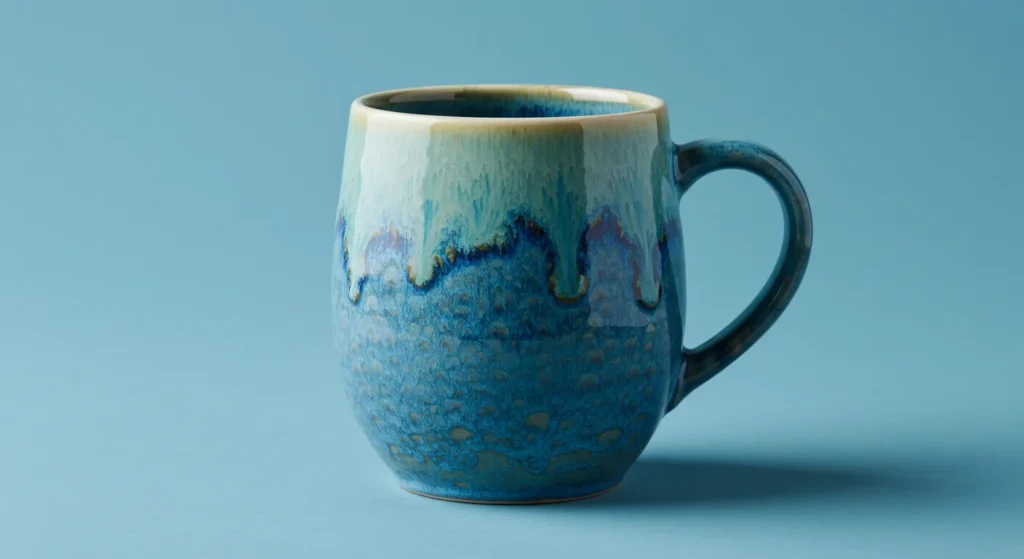
Profitable photos are clear, colour-accurate, and, above all, consistent. They build trust. When a customer receives an item that looks exactly like it did on your website, they become a repeat customer. When it doesn’t, it becomes a costly return.
A study found that 75% of online shoppers rely on product photos when purchasing. They aren’t looking for art; they’re looking for information and assurance.
This is where so many brands get it wrong. They fall for the hyper-perfect, over-retouched look. They smooth out every trace of texture from a leather wallet or make a wooden table look like it was moulded from plastic.
This doesn’t scream “quality.” It screams “fake” and makes customers wonder what you’re trying to hide. Your editing should enhance reality, not erase it.
Before You Touch a Single Slider: The Non-Negotiable Prep Work
A great edit starts long before you open any software. Getting your prep work in order will save you hours of frustration.
Start with a Decent Photo (Garbage In, Garbage Out)
Let’s clarify: editing software is for enhancement, not resurrection. It cannot fix an out-of-focus shot. It cannot salvage a photo taken in a dark room with a horrible yellow cast.
Your single most significant lever for better photos is better lighting. A simple, large window with indirect sunlight is more potent than any Photoshop filter.
Culling: Be Mercilessly Efficient
Don’t import 300 photos into your editing software. That’s just asking for a miserable afternoon. Do a quick pass through your images first and be ruthless.
If it’s not sharp, delete it. If the composition is awkward, delete it. If the product is half in shadow, delete it.
Your goal is to narrow the field to only the strongest candidates. This 10-minute culling process will save you an hour of editing.
A Simple File System Prevents Chaos
Don’t just dump everything on your desktop. A lack of organisation is a tax on your time. Create a simple folder structure you can reuse for every shoot.
Try this:
- Product_Name (e.g., Leather_Wallet_Sept2025)
- 01_RAW (or originals)
- 02_Edited (your working files)
- 03_Final_Web (your exported JPEGs)
This simple system means you’ll always know where everything is, which is crucial when finding a specific image three months from now.
The 5-Step Workflow That Actually Matters (The 80/20 System)
Forget the hundred-step retouching tutorials. This is the assembly line. It’s a repeatable process you can apply to 99% of your product photos for consistent, professional results.
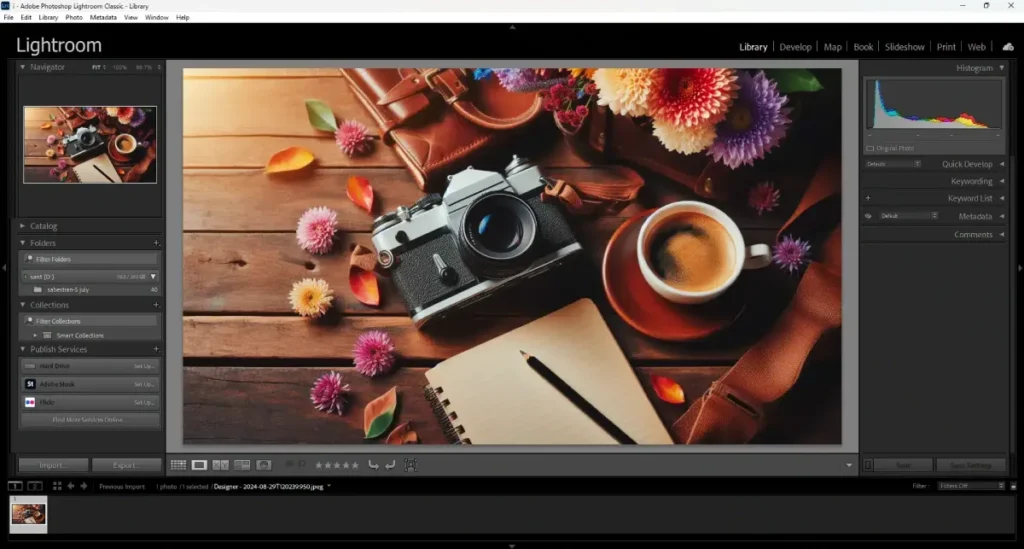
Step 1: Global Adjustments & Batch Processing (The Foundation)
This is the most critical step, where you’ll achieve consistency. Adobe Lightroom is the best tool for this job because it’s built to handle large groups of photos at once.
First, pick one representative photo from your shoot and adjust the “Big Three”:
- White Balance: This is the absolute key to colour accuracy. Your camera often gets this slightly wrong. Use the eyedropper tool and click on something in the photo that should be neutral grey or white. Watch the colour cast disappear. This single click is the most critical edit you will make.
- Exposure: Is the photo too dark or too bright? Adjust the main Exposure slider so the product is clearly visible. Don’t be afraid to pull the Highlights slider down to bring back detail in bright areas or lift the Shadows slider to see detail in dark places.
- Contrast: Add a little punch. A slight bump in the Contrast or Dehaze slider can make a product look more solid and defined. Don’t overdo it.
Now, the magic part. Once you’ve nailed the settings on that first image, select it, then select all other similar photos from the shoot. Click “Sync Settings.”
You’ve just applied a consistent, foundational edit to your entire photoshoot in about five seconds. This is how you avoid colour inconsistency—one of my biggest pet peeves.
Step 2: Cropping, Straightening & Consistency (The Framework)
Your products shouldn’t be floating in a random assortment of rectangular frames. Consistency here makes your website look professional.
Set a single aspect ratio and stick to it. For most e-commerce platforms like Shopify, a 1:1 square or a 4:5 vertical rectangle works beautifully. For Amazon, a 1:1 square is a requirement.
In your editing software, set the crop tool to your chosen aspect ratio (e.g., 1×1). Now, crop every single image to that same frame.
Ensure the product is centred and has some “breathing room” around the edges. Use the straighten tool to ensure horizon lines or product edges are perfectly level.
Step 3: Local Adjustments & Retouching (The Clean-Up)
Now you can zoom in and fix the little things. This is for minor distractions, not major surgery.
The Spot Healing Brush (available in Lightroom, Photoshop, and many other apps) is your best friend. Use it to click on tiny imperfections and watch them disappear.
What to fix:
- Specks of dust on the product or background.
- A tiny scratch from shipping.
- A stray thread on a piece of clothing.
What not to fix:
- The natural grain of wood.
- The texture of leather.
- Anything that is a feature of the material.
Add a subtle, soft drop shadow if your product is on a solid background. This gives the item a sense of weight and prevents it from looking awkwardly floating in space.
Step 4: Sharpening (The Final Polish)
Sharpening should be the very last adjustment you make. It adds a final bit of crispness and detail, making an image look professional online.
Every program has a sharpening tool. The key is to be subtle. Over-sharpening creates a “crunchy” look with ugly, bright halos around the edges of your product.
A good starting point in Lightroom is:
- Amount: 70-80
- Radius: 1.2
- Detail: 25
Apply this, zoom in to 100% to check your work, and leave it alone.
Step 5: Exporting for the Web (The Performance Check)
This is the final, and most frequently botched, step. All your hard work can be ruined by exporting with the wrong settings.
A massive file will slow your website to a crawl, and a 1-second delay in page load time can result in a 7% reduction in conversions.
Here are the non-negotiable export settings for web:
- File Type: Use JPEG for any photo with a solid background. Use PNG-24 only when you need a transparent background.
- Colour Space: This must be sRGB. If you use anything else, your colours will look wrong in most web browsers. No exceptions.
- Image Dimensions: 2048 pixels on the longest edge is an excellent standard for most e-commerce platforms. It’s big enough for a good zoom but not excessive.
- Quality / Compression: Set the quality between 70 and 85 for JPEGs. Your goal is a final file size of under 200KB. Use a tool like TinyPNG to compress it further without losing noticeable quality.
Choosing Your Weapon: The Right Tool for the Job
You don’t need a massive software arsenal. You just need the right tool for your specific needs.
The Professional Standard: Adobe Lightroom & Photoshop
There’s a reason this is the industry standard. The combination is unbeatable for e-commerce.
- Adobe Lightroom Classic should be your home base. Use it for 90% of your work: importing, culling, organising, batch editing, and exporting. Its power is in handling entire photoshoots at once.
- Adobe Photoshop is the specialist. Use it when you need to do heavy lifting that Lightroom can’t handle, like combining multiple images, advanced background removal, or the “ghost mannequin” effect. Think of it as the tool you open for the final 10% of jobs.
The Beginner & Budget Options: Canva, Fotor, etc.
Tools like Canva are excellent for creating social media graphics or a quick banner image. They have basic photo editing sliders and are very approachable.
However, for a serious e-commerce store with dozens of products, they fall short. They lack robust batch processing, have limited support for RAW files (which contain more data for editing), and offer less precise control than dedicated software.
They’re a decent starting point, but you’ll likely outgrow them.
A Harsh Word on “Magic” AI Tools and Presets
My second pet peeve is the myth of the magic preset. People sell these Lightroom presets with promises of one-click professional photos. It’s nonsense.
A preset is just a saved collection of slider settings. It can be a fantastic starting point to give your photos a consistent style. But it cannot fix a poorly lit, out-of-focus photo.
If your white balance is wrong, a preset will apply its style to that incorrect colour. Always fix your foundation (white balance, exposure) first, then consider using a stylistic preset if it fits your brand.
When to Stop Wasting Your Time and Outsource It

At some point, doing it yourself is no longer cost-effective. You need to calculate your “editing breakeven point.”
Figure out your effective hourly rate. Let’s say it’s $50/hour. If it takes 2 hours to edit a batch of 10 photos, you’ve spent $100 of your time. Now, look up a professional product photo editing service. They charge $2-$5 per image for background removal and basic retouching. That same batch would cost you $20-$50.
Outsourcing becomes a no-brainer when:
- You have a high volume of images every month.
- Your products are complex to edit (like jewellery, which involves intricate paths and reflection management).
- You need advanced techniques like the ghost mannequin effect.
Your time is better spent on marketing, product development, and customer service. Good editing is a critical part of your overall digital marketing strategy, but that doesn’t mean you personally have to do it.
Your Quick-Reference Editing Checklist
Pin this to your wall. Run through it for every batch of photos.
- Cull ruthlessly: Delete all unusable shots first.
- Set White Balance: Get the colours right from the start.
- Adjust Exposure & Contrast: Ensure the product is clear and has pop.
- Sync Settings: Apply foundational edits to the entire batch simultaneously.
- Crop consistently: Use the same aspect ratio for every image.
- Spot Heal: Remove distracting dust and minor flaws.
- Sharpen Subtly: Add a final touch of crispness.
- Export Correctly: sRGB, JPEG, <200KB, ~2048px.
Editing is a Business Tool, Not an Art Project
Stop overthinking it. Stop aiming for artistic perfection.
The best product photo editing is invisible. It doesn’t draw attention to itself with dramatic filters or an artificial, plastic sheen. Its job is simple: to represent your product clearly, accurately, and consistently.
It’s a tool to build trust with your customer before they ever hold the product. Master the simple, repeatable workflow. Know when to do it yourself and when to hand it off. Reinvest the time you save into growing the business. That’s how you get photos that don’t just look good—they sell.
Frequently Asked Questions (FAQs)
What is the best software for product photo editing?
For serious e-commerce, Adobe Lightroom is the best tool for organising and batch editing, which covers 90% of the work. Adobe Photoshop is used for more complex tasks like background removal or compositing. For beginners, tools like Canva or Fotor can handle basic adjustments.
How do I get a pure white background for my product photos?
The best way is to shoot on a white background with good lighting and then adjust the “Whites” or “Levels” in your editing software to make the background pure white (FFFFFF). A professional background removal service or Photoshop’s Pen Tool is more effective for tricky products.
What’s more important: photo lighting or editing?
Lighting is far more critical. Good lighting creates a good source file with plenty of detail and accurate colour. Editing can only enhance what’s already there; it cannot fix a flawed, poorly lit photograph.
Should I shoot in RAW or JPEG?
Shoot in RAW if your camera supports it. RAW files capture much more data, giving you significantly more flexibility to correct exposure and white balance during editing without losing quality. JPEGs discard data to keep file sizes small, limiting your editing potential.
How much should I sharpen my product photos?
Sharpening should be subtle. It’s the final step before exporting. A good rule of thumb is to apply enough sharpening so the product looks crisp at 100% zoom, but not so much that you see bright “halos” around the edges.
What are the ideal image dimensions for Shopify?
Shopify recommends using images that are 2048 x 2048 pixels for square product photos. This provides a high-quality image with good zoom capabilities. For other aspect ratios, aim for 2048 pixels on the longest side.
How can I make my product colours more accurate?
The most crucial step is setting the correct White Balance during editing. Use the white balance eyedropper tool on your photo’s neutral white or grey area. For ultimate accuracy, use a grey card when shooting.
Is it worth outsourcing photo editing?
Yes, it is often worth it. If you value your time more than a few dollars an hour, outsourcing tasks like background removal or batch retouching to a specialised service is almost always more cost-effective than doing it yourself.
What’s the difference between exposure and brightness?
Exposure adjusts the overall light captured in the photo, affecting the highlights, mid-tones, and shadows together. Brightness primarily lifts the mid-tones, which can sometimes wash out an image. For initial corrections, adjusting Exposure is almost always the better choice.
What does “sRGB” mean, and why is it important?
sRGB is a standard colour space for the web. Exporting your images in the sRGB colour space ensures that the colours you see on your screen will be displayed consistently and accurately across different web browsers and devices.