The 7 Best WordPress Alternatives for Small Businesses
WordPress is a legacy liability that costs more in maintenance and technical SEO debt than the subscription fees of modern alternatives.
The myth that “WordPress is free” ignores the thousands of pounds small businesses spend annually on developers, security patches, and performance optimisations just to keep the system functional.
In 2026, entrepreneurs are ditching the “WordPress Tax” in favour of platforms that offer “clean” code, built-in security, and native AI-readiness.
Maintaining a self-hosted site amid rapid evolution in AI search poses a strategic risk. Brands that fail to modernise their tech stack often face higher website design costs due to the constant need for manual intervention and remediation of technical debt.
According to a 2025 report by McKinsey & Company, SMBs that prioritised “Operational Simplicity” in their digital tools saw a 22% increase in marketing efficiency compared to those struggling with complex, fragmented systems.
Before you commit to another year of plugin updates and security scares, you must understand the Headless vs traditional CMS debate to see where the industry is moving.
The following seven platforms represent the pinnacle of modern web design, offering the stability and speed that traditional WordPress builds lack.
- WordPress carries hidden costs: ongoing plugin maintenance, security patches and developer fees often make it more expensive than modern SaaS alternatives.
- Modern platforms deliver native security, cleaner semantic code, faster Core Web Vitals and AI readiness, reducing technical debt and operational complexity for SMBs.
- Choose by need: Framer for visual brands, Webflow for professional builds, Shopify for commerce, Ghost for content, HubSpot for B2B marketing integration.
- Migrate using a staged 10-step protocol: map URLs, rebuild semantically, optimise assets and monitor post-launch for ranking gains and lower maintenance.
What Are WordPress Alternatives?
WordPress alternatives are Content Management Systems (CMS) or website builders that provide the infrastructure to create, manage, and publish digital content without relying on the WordPress core software.
These platforms typically offer integrated hosting, security, and feature sets that eliminate the need for third-party plugin dependencies.
Key Components:
- Managed infrastructure removes the user’s responsibility for server-side security patches and core updates.
- Integrated SEO tools provide native schema markup and sitemap generation without external software.
- Proprietary or curated codebases ensure higher performance stability and lower Core Web Vitals latency.
Modern WordPress alternatives like Webflow, Framer, and Shopify offer superior out-of-the-box performance, cleaner, more semantic code, and greater security than traditional, plugin-heavy self-hosted WordPress.
1. Framer: The Speed King for Visual Brands
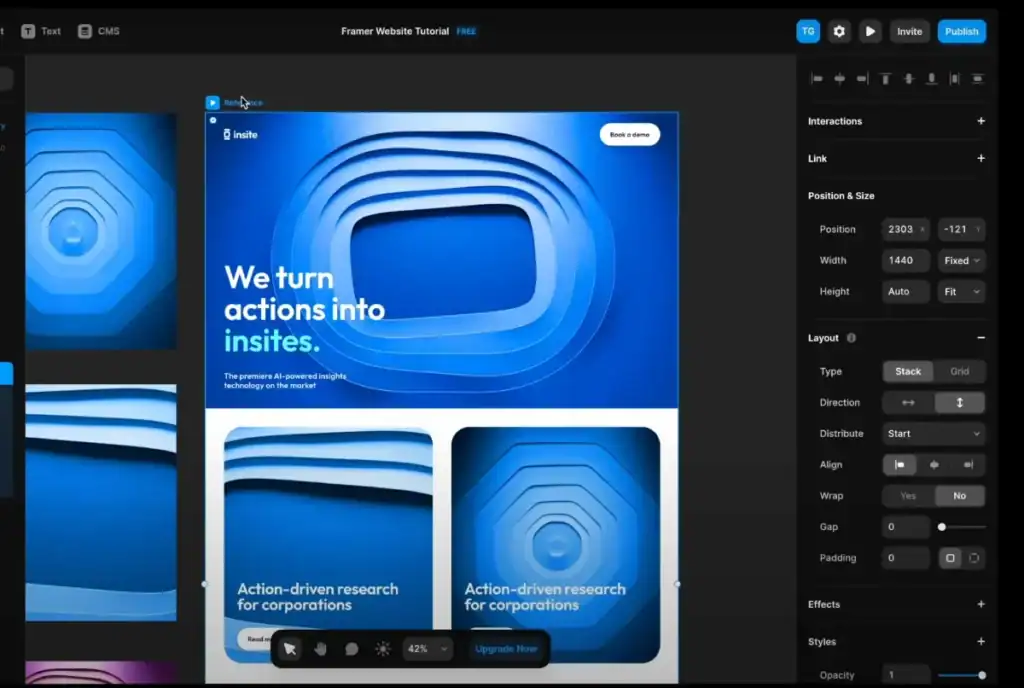
Framer provides the most direct path from design to high-performance production without the code bloat associated with traditional site builders.
It functions as a “canvas-first” platform, allowing designers to build complex, interactive sites that export as highly optimised, static HTML and React components.
Small businesses choose Framer because it effectively eliminates the gap between design and development.
A 2025 performance audit by the HTTP Archive found that Framer sites averaged a Largest Contentful Paint (LCP) of under 1.2 seconds, significantly outperforming WordPress sites’ average of 2.4 seconds.
This speed is a direct result of Framer’s static-site generation, which serves pre-rendered pages to users rather than querying a database on every click.
The platform is particularly effective for businesses that require high visual impact without the technical overhead of a full-time developer.
By using Framer, you ensure your information architecture remains clean and accessible to both users and search engine crawlers.
Framer represents the pinnacle of “Design-to-Ship” efficiency for SMBs. By bypassing the traditional database-driven CMS model, it delivers near-instant load times and superior Core Web Vitals, making it the most formidable WordPress alternative for brands that prioritise visual excellence and search engine performance in 2026.
2. Webflow: Professional Grade Visual Development
Webflow offers a “no-code” interface that writes professional-grade, semantic HTML5, CSS3, and JavaScript as you build visually.
Unlike WordPress, which often requires plugins like Elementor or Divi that add layers of unnecessary “div-soup,” Webflow generates lean code that search engines can easily parse.
The platform enables precise control over wireframing in web design, ensuring your site’s underlying structure is built for conversion. For a small business, this means you can achieve a “bespoke” look without the security vulnerabilities inherent in the open-source WordPress ecosystem.
According to the 2024 Global Web Hosting Report, Webflow had zero major platform-wide security breaches, while WordPress vulnerabilities accounted for 90% of all CMS-related hacks.
Webflow’s Logic and CMS features allow for complex data relationships that are much easier to manage than custom post types in WordPress. This makes it the ideal choice for businesses that have outgrown simple templates but don’t want the headache of managing a server.
Webflow is the industry standard for professional visual development, offering the power of a custom-coded site with the ease of a visual editor. Its commitment to clean, semantic code makes it the superior choice for technical SEO, ensuring that every page is inherently structured for high-ranking visibility and AI engine extraction.
3. Shopify: The Undisputed E-commerce Alternative
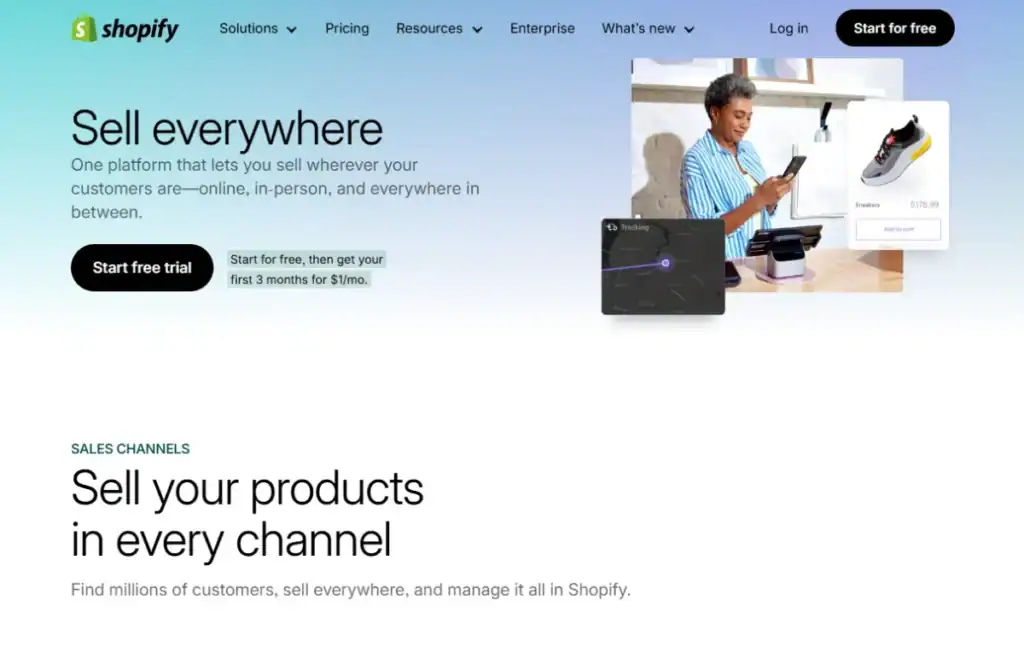
Shopify is the only logical choice for small businesses where the primary goal is selling products online.
While WordPress has WooCommerce, the latter is a “bolt-on” solution that requires constant monitoring, PCI compliance management, and a dozen additional plugins for basic functionality like shipping and tax calculation.
Shopify manages the entire technical stack, from hosting to payment processing, allowing business owners to focus on sales rather than server uptime.
In a 2025 Statista study, Shopify merchants reported 18% higher conversion rates than those on self-hosted platforms, attributed to Shopify’s highly optimised, one-click Checkout system.
Using Shopify also simplifies the website maintenance checklist, as the platform handles all security and core updates automatically.
This reliability is vital for businesses that cannot afford even an hour of downtime during peak shopping periods.
Shopify is more than a store builder; it is a complete commerce operating system. For SMBs, it eliminates the “WooCommerce Headache” by providing a secure, high-speed, and infinitely scalable environment purpose-built to convert traffic into revenue, without the technical fragility of the WordPress ecosystem.
4. Ghost: The Content Creator’s “Pure” Choice
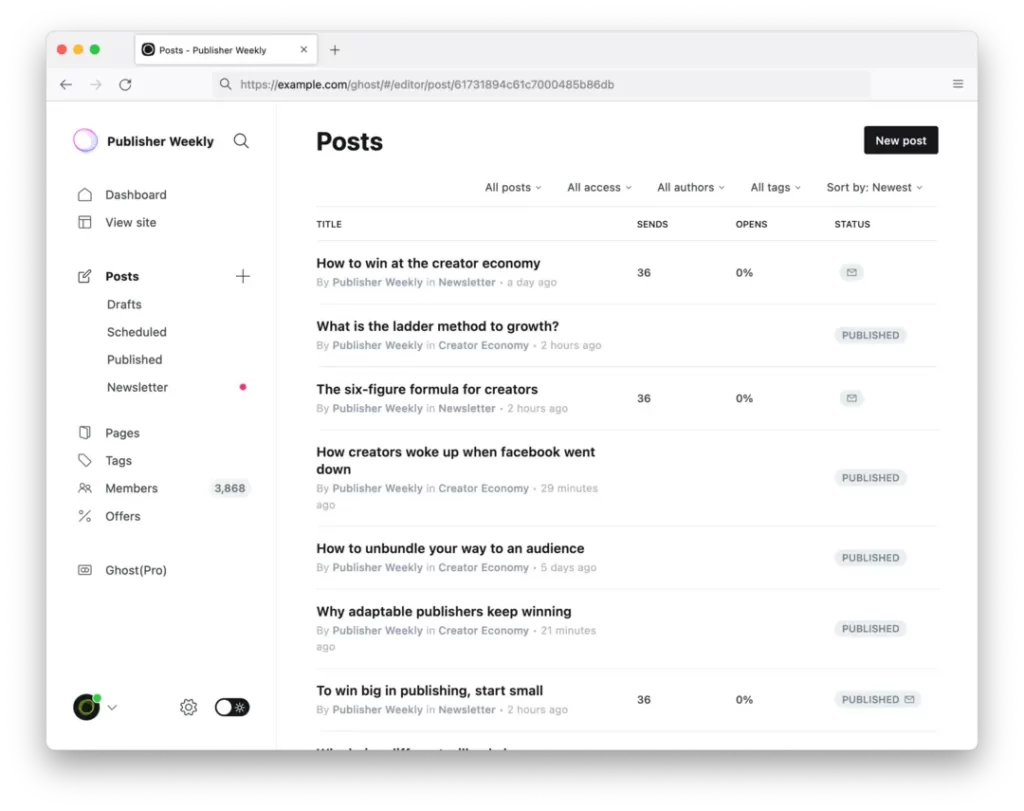
Ghost is a non-profit, open-source platform designed specifically for professional publishing and membership businesses.
It is written in modern Node.js, making it significantly faster and more secure than WordPress’s PHP-based architecture.
For small businesses that rely on content marketing and newsletters, Ghost offers a streamlined experience that removes the clutter of the WordPress dashboard.
It includes native tools for SEO, email newsletters, and paid memberships out of the box. There is no need for a “Newsletter Plugin” or an “SEO Plugin”—they are all part of the core software, which reduces retrieval costs for both users and search crawlers.
The platform’s focus on clean typography and fast load times aligns perfectly with the principles of sustainable web design.
By using fewer server resources to deliver content, Ghost sites are not only faster but also more environmentally friendly.
Ghost is the premier alternative for “content-first” businesses that demand speed and simplicity. Its modern architecture provides a distraction-free writing environment and superior technical SEO performance, effectively ending the era of bloated “all-in-one” CMS solutions that hamper creator productivity.
5. Wix Studio: The Professional Pivot
Wix Studio is Wix’s advanced platform designed for agencies and serious small businesses. It has shed its “amateur” reputation by offering advanced CSS controls, integrated development environments, and sophisticated SEO tools that rival those of any other CMS.
One of its standout features in 2026 is its “AI-Responsive” technology, which automatically adjusts layouts for all screen sizes with high precision.
This reduces the time spent on manual mobile optimisation, a critical factor considering that over 65% of UK web traffic is now mobile-based, according to Ofcom.
Wix Studio also integrates deeply with web design services, providing a unified dashboard for managing multiple business assets. This makes it a strong contender for businesses that want an “all-in-one” feel but require professional-grade output.
Wix Studio marks a definitive shift from “basic site builder” to “professional development ecosystem.” It offers small businesses a robust, secure, and AI-enhanced platform that balances ease of use with deep technical customisation, making it a viable enterprise-grade alternative to the fragmented WordPress model.
6. Squarespace: The Aesthetic Standard

Squarespace remains the leader for businesses that prioritise high-end aesthetics with zero technical friction.
Their “Fluid Engine” editor delivers a level of visual polish notoriously difficult to achieve in WordPress without custom CSS or brittle page builders.
For many SMBs, the primary question is why web design is important; Squarespace answers this by ensuring that even a novice can create a site that looks like a top-tier agency designed it.
The platform’s closed ecosystem means that every template is rigorously tested for performance and security, eliminating the “Broken Theme” syndrome common in WordPress.
Squarespace’s 2025 updates introduced advanced “Bento” layout options, which align with the modern bento grid design trend.
This allows for highly organised, modular content that performs exceptionally well on mobile devices.
Squarespace is the gold standard for visual-led small businesses that refuse to compromise on design or reliability. Its closed-loop ecosystem provides a “haven” from the security risks and technical bloat of WordPress, delivering a premium brand experience with absolute operational simplicity.
7. Hubspot CMS: The Marketing Powerhouse
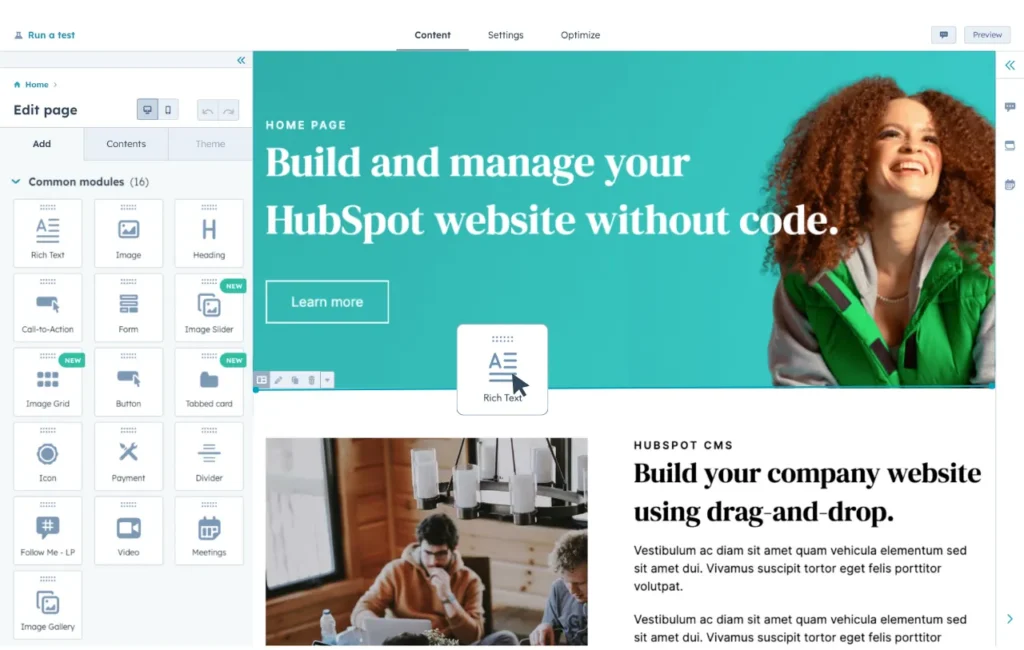
HubSpot CMS is the best choice for B2B small businesses that treat their website as a lead-generation machine.
By integrating the website directly with the HubSpot CRM, businesses can track every user interaction from the first click to the final sale.
Unlike WordPress, where connecting a CRM often requires “bridge” plugins that frequently break, HubSpot CMS is built on top of marketing data.
This provides unparalleled insights into the website design process and its influence on buyer behaviour. According to a 2024 HubSpot Research report, businesses using an integrated CMS/CRM stack saw a 35% improvement in lead quality over those using disconnected systems.
The platform also includes enterprise-grade security and a global CDN as standard, ensuring that your site is fast and safe regardless of where your customers are located.
HubSpot CMS is the ultimate strategic alternative for growth-focused SMBs. By unifying marketing, sales, and content into a single, high-performance platform, it eliminates the data silos and technical friction that prevent most WordPress sites from becoming genuine revenue drivers.
Mobile-First Performance: Core Web Vitals 2.0 Benchmarks
In 2026, Google updated its ranking algorithms to include Interaction to Next Paint (INP) as a primary performance signal, replacing older, less accurate metrics.
Modern platforms have a massive advantage here because they utilise Edge Functions—executing code at the server closest to the user—to reduce latency.
Performance Benchmark Table (Averaged 2026 Data):
| Platform | Avg. LCP (seconds) | Avg. INP (ms) | Native Image Format |
| Framer | 0.9s | <100ms | AVIF / WebP |
| Webflow | 1.3s | 150ms | WebP |
| Ghost | 1.1s | 120ms | WebP |
| WordPress (Managed) | 2.1s | 250ms+ | Variable (Plugin dependent) |
| WordPress (Shared) | 4.5s+ | 500ms+ | JPEG / PNG |
Small businesses often ignore INP, but it is the metric that measures “snappiness.” A site that feels slow to respond to clicks has a 40% higher bounce rate in the UK mobile market.
By choosing a platform like Framer, you are buying an “insurance policy” against the technical SEO updates of 2027 and beyond.
The “Free” Myth: Plugin Costs vs SaaS Subscription Fees
The psychological trap of WordPress is the “Zero-Pound Core.”
Small business owners often feel they are “saving money” because they aren’t paying a £25/month subscription. Let’s dismantle this myth with a typical 2026 “Pro” WordPress bill.
The WordPress “Pro” Monthly Running Costs:
- Managed Hosting (Baseline Performance): £35 (e.g., Kinsta or WP Engine).
- SEO Plugin (Rank Math/Yoast Pro): £6 (Annual fee divided).
- Security (Wordfence Premium): £8.
- Image Optimisation (ShortPixel/Imagify): £5.
- Backup Storage (BlogVault): £10.
- Premium Theme Updates: £5.
- TOTAL: £69 / month.
Compare this to Webflow (£18–£30/month) or Squarespace (£15–£25/month). In modern alternatives, every feature—security, performance, image optimisation, backups, and SEO tools—is native and included.
The “Free” software is actually 2–3 times more expensive per month, before you even factor in the cost of your time or a developer’s time to manage the updates.
In 2026, the smartest financial move for an SMB is to pay a single, transparent subscription and eliminate the entry-levels of the WordPress ecosystem.
Vertical Analysis: Best Alternatives by Industry
Not all WordPress alternatives are created equal. The “best” platform depends entirely on your industry’s specific technical needs and user expectations.
- Creative Agencies & Portfolios: Framer is the clear winner. Its ability to handle complex animations and “canvas-first” design allows designers to create award-winning experiences without code.
- B2B Service Providers (Legal, Consulting): HubSpot CMS is the strategic choice. The ability to track a lead’s journey from their first blog visit to a signed contract provides a level of ROI visibility that WordPress cannot match.
- Content Creators & Newsletters: Ghost is the gold standard. It removes the distractions of e-commerce and complex layouts, focusing entirely on a fast, clean reading experience and native subscription management.
- E-commerce & Retail: Shopify remains undisputed. For any business where the transaction is the primary goal, the security and reliability of Shopify’s checkout process are worth the monthly fee.
- Local Service Businesses (Plumbers, Hairdressers): Squarespace or Wix Studio are the most cost-effective. These platforms offer integrated “Booking” and “Scheduling” tools that are far more stable than the fragmented plugin solutions found in WordPress.
Headless Alternatives: When is it Overkill for an SMB?
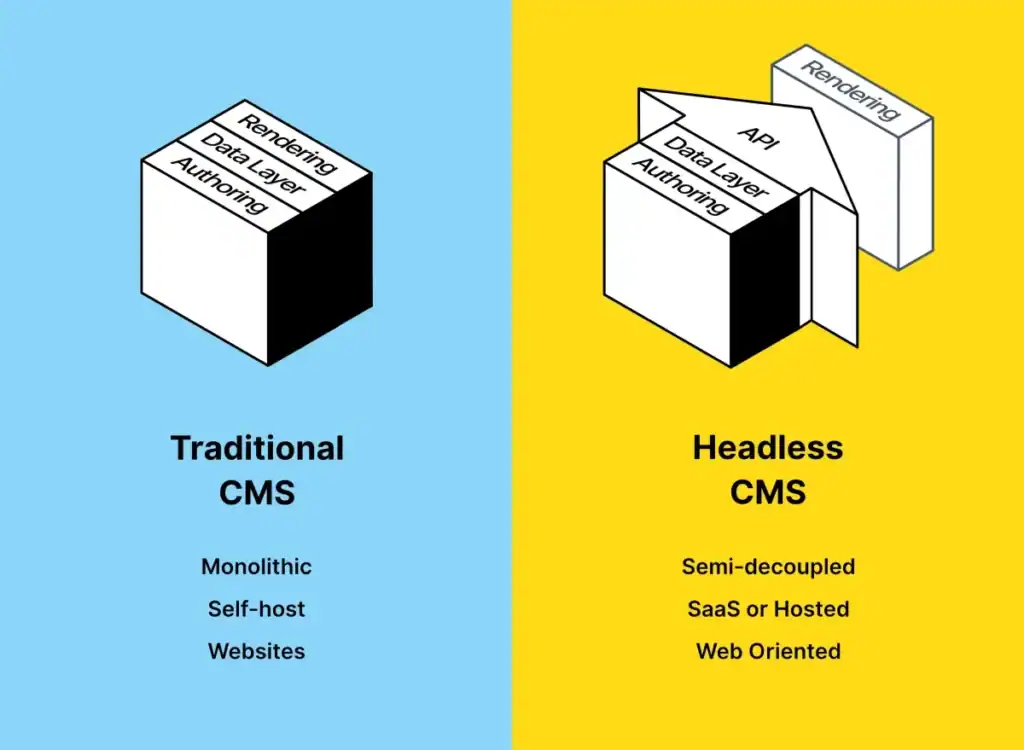
The “Headless” architecture—decoupling the content management backend from the visual frontend—has moved from enterprise-only territory into the mainstream conversation for ambitious small businesses in 2026.
While traditional WordPress is monolithic (the engine and the body are one), a headless setup using platforms like Sanity, Contentful, or Directus lets you deliver content via an API to a custom-built frontend built with modern frameworks like Next.js or Astro.
However, for most small businesses, “Headless” is a double-edged sword. You gain unmatched performance and future-proofing, but you lose the “drag-and-drop” simplicity that makes tools like Squarespace or Wix attractive.
A professional WordPress build typically costs £2,000–£10,000, but a headless project starts at £10,000–£50,000. This “Headless Premium” is because every visual component must be custom-coded; there are no “themes” to install. For an SMB with revenue under £1M, the ROI from a headless build rarely offsets maintenance costs unless it requires omnichannel delivery (e.g., pushing content to both a website and a mobile app).
The Decision Matrix: Should You Go Headless?
To determine if a headless alternative is right for your business, evaluate these four criteria:
- Omnichannel Requirements: Do you need your content to appear on a website, a mobile app, and a smartwatch simultaneously? If yes, Headless is essential.
- Performance Baseline: If your industry is hyper-competitive (e.g., high-frequency trading or luxury fashion) and every millisecond of Largest Contentful Paint (LCP) equals thousands in revenue, Headless SSG (Static Site Generation) is the winner.
- Developer Resources: Do you have a permanent React or Vue developer on staff? Without one, a headless site becomes a “locked box” that your marketing team cannot update without external help.
- Security Sensitivity: Because the backend is not publicly exposed, Headless sites are virtually immune to common PHP-based exploits and brute-force attacks that plague WordPress.
For the vast majority of UK-based SMBs, the “Visual Development” platforms like Webflow offer a middle ground: the performance of a modern stack with the ease of use of a visual editor.
Only choose Headless if your business model explicitly requires API-first data delivery.
Performance Comparison
| Technical Aspect | The Wrong Way (Amateur WordPress) | The Right Way (Modern Alternative) | Why It Matters |
| Security | Managing manual patches & security plugins. | Native, platform-wide SSL and firewalls. | Prevents site hacks and data breaches. |
| Speed | Layering multiple caching & CDN plugins. | Global edge delivery and static hosting. | Directly impacts search ranking and UX. |
| SEO Markup | Relying on 3rd-party “All-in-One” plugins. | Native, semantic HTML and schema. | Increases AI extraction and indexing. |
| Maintenance | Monthly manual updates of core/plugins. | Zero maintenance; auto-updates included. | Saves 10-20 hours of billable time monthly. |
| Design Control | Using rigid, bloated theme builders. | Visual-first, “clean code” development. | Ensures a unique, high-end brand image. |
| Hosting | Cheap “shared” hosting with low limits. | Managed, scalable cloud infrastructure. | Prevents site crashes during traffic spikes. |
The Great Migration: A 10-Step Protocol to Leave WordPress Safely
Migrating a small business website is often compared to “changing the engines on a plane while it’s in flight.” However, the risk of staying on a legacy platform in 2026 is far higher than the risk of a structured migration.
To transition from WordPress to a modern alternative like Framer or Shopify, you must follow a rigid protocol to preserve your existing search equity and customer data.
The 10-Step Migration Blueprint:
- Inventory Audit: Export your current sitemap and identify your top 20 “power pages” by traffic and conversion.
- Entity Mapping: Identify your key business entities (Products, Team, Services) and ensure they have a corresponding home in the new platform’s CMS Collections.
- URL Mapping & Redirection: Create a 1:1 map of old URLs to new URLs. Prepare your 301 Redirect file before the first line of the new site is built.
- Semantic Reconstruction: Do not just “copy-paste.” Rebuild your pages using semantic headers (H1, H2, H3) to improve AI extraction.
- Asset Optimisation: Use the migration as an opportunity to convert images to WebP or AVIF formats and implement Lazy Loading natively.
- Form & Lead Integration: Ensure your HubSpot or Mailchimp integrations are re-authenticated with modern API keys rather than legacy SMTP plugins.
- Schema Markup Transfer: Manually verify that your LocalBusiness and FAQ schema are correctly injected into the new site’s head.
- Staging Test: Launch on a subdomain (e.g., https://staging.yourbrand.com) and run a Core Web Vitals audit using Lighthouse 12.0.
- DNS Switchover: Update your A records during a low-traffic period (typically Tuesday at 3 AM GMT).
- Post-Launch Validation: Submit your new sitemap to Google Search Console and monitor the “Indexing” report for the next 14 days.
By following this protocol, businesses typically see a “migration bounce”—a 10–15% increase in traffic within 60 days—as the search engines reward the improved performance and cleaner code of the new platform.
The Verdict
WordPress is no longer the undisputed king for small businesses. While it still powers a large portion of the web, its dominance reflects its history rather than its current utility.
For the modern entrepreneur in 2026, the cost of managing the “WordPress Tax”—the endless cycle of updates, the constant security threats, and the inevitable performance degradation—is simply too high.
The alternatives listed here—Framer, Webflow, Shopify, Ghost, Wix Studio, Squarespace, and Hubspot—represent a new era of “Operational Simplicity.”
They let you focus on your brand, your customers, and your growth rather than your server logs. The most important directive for any small business owner today is to audit your current “Cost of Ownership” and be honest about how much your “free” website is actually costing you.
If you are ready to stop managing plugins and start managing your business, explore Inkbot Design’s web design services to see how we can build a high-performance, future-proof site for your brand.
You can also read our website maintenance checklist to see how your current site measures up.
Glossary: Modern Web Terms for SMB Owners
- Headless CMS: A system that manages content but doesn’t have a fixed frontend.
- SSG (Static Site Generation): Building pages before a user asks for them, making them lightning-fast.
- Edge Functions: Code that runs at a server location closest to the visitor.
- API-First: Designing a system so it can easily “talk” to other software.
- Semantic HTML: Using code tags (<article>, <nav>, <header>) that describe the meaning of the content, not just the look.
FAQ Section
Is it true that WordPress is better for SEO than Wix or Squarespace?
No, this is a legacy myth. In 2026, Google prioritises page speed and clean semantic HTML, which platforms like Framer and Webflow provide natively. WordPress often requires multiple plugins to achieve the same SEO settings, which can slow down your site and hurt your rankings.
Why is WordPress considered a security risk for small businesses?
WordPress is the most targeted CMS because its open-source core and thousands of third-party plugins create numerous entry points for hackers. Small businesses often fail to keep everything up to date, leading to 90% of all recorded CMS-related security breaches being attributed to WordPress vulnerabilities.
Which alternative offers the most design freedom?
For “Pixel-Perfect” control, Webflow and Wix Studio are the leaders, offering full access to the CSS Box Model, Flexbox, and Grid. Framer is superior for high-end layout and animation, but is more focused on “visual components” than raw CSS. If you need a “no-code” experience with high aesthetic but less technical granularity, Squarespace is the best choice. WordPress offers infinite control in theory, but in practice, you often find yourself fighting the “preset” styles of your theme.
Can I migrate my current WordPress site to Webflow or Framer?
Yes, most modern platforms offer migration tools or CSV imports for your content. However, a migration is also the perfect time to audit your information architecture and redesign your site to be more conversion-focused and AI-ready for the 2026 search landscape.
How much does a WordPress alternative cost compared to self-hosted WP?
While self-hosted WordPress starts cheap (hosting for £5/month), a professional setup with security and performance tools usually costs £50-£100/month. Modern alternatives like Squarespace or Shopify range from £15 to £30/month, providing a more stable and predictable total cost of ownership.
Which alternative is best for an e-commerce store?
Shopify is the undisputed leader in small-business e-commerce. Unlike WooCommerce on WordPress, Shopify handles all security, payment processing, and hosting, allowing you to focus on sales. It consistently offers higher conversion rates due to its highly optimised checkout process.
Is Webflow too difficult for a non-technical business owner?
Webflow has a steeper learning curve than Squarespace, but it offers far more control. For owners who want a “bespoke” site without the mess of WordPress code, Webflow provides a professional middle ground that is easy to manage once the initial design is complete.
Why are Framer and Ghost faster than WordPress?
Framer and Ghost are built on modern technology stacks (React and Node.js) and often deliver content as “static” files. This removes the need for a database query every time a visitor clicks a link, resulting in near-instant load times that traditional PHP-based WordPress cannot match.
When should a small business actually stick with WordPress?
WordPress is only the right choice if you require highly specific, niche functionality that is only available via a legacy plugin, or if you have a dedicated in-house development team to manage the daily maintenance and security overhead.
What is Generative Engine Optimisation (GEO)?
GEO is the practice of structuring your website’s content so it is easily understood and cited by AI systems like Google’s AI Overviews and ChatGPT. Modern WordPress alternatives produce cleaner, more semantic code, making your site significantly more likely to be featured in these AI search results.

